

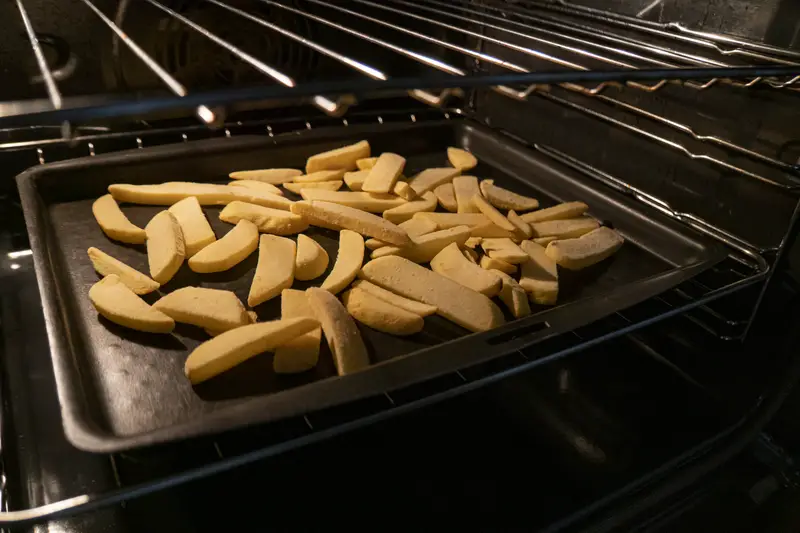
I spent way too many years cooking frozen fries the lazy way. Rip open the bag, dump it on a cold pan, slide it in the oven, and hope for the best. What I got back was a tray of pale, floppy sticks that bent in half when I picked one up. If you have ever felt let down by your own fries, I promise the problem is not the brand you bought. It is one tiny step you are almost certainly skipping.
Here it is: before those fries ever hit heat, you need to preheat your baking sheet along with your oven. Not just the oven. The actual metal pan. A hot pan is the difference between fries that crisp on contact and fries that sit there sweating. This is the trick restaurant cooks lean on, and it costs you nothing but a few extra minutes. Let me walk you through why it works and how to nail it.
Why A Screaming Hot Pan Is The Real Secret
Think about searing a steak. You would never lay it in a lukewarm pan and slowly turn up the heat. It would steam and turn gray instead of getting that brown crust. Frozen fries work the exact same way. When you drop them onto a cold sheet, the surface has to warm up before anything good happens, and while it does, the fries release moisture that has nowhere to go. That trapped steam is what leaves you with sogginess.
One recipe developer put it perfectly: sliding your rimmed baking sheet into the oven as it preheats gives you that crisp exterior right off the bat. When the fries land on the hot metal, you should hear an honest sizzle. That sound means the surface is already browning instead of thawing. No sizzle, no crunch. It really is that simple, and it is the whole point of this article.
Leave Them Frozen, Every Single Time
This goes hand in hand with the hot pan. Do not leave your fries out on the counter to thaw first, thinking you are getting a head start. You are actually working against yourself. The folks at the Idaho Potato Commission are about as authoritative as it gets on this, and their message is blunt: keep frozen fries completely frozen before using. The frozen state acts like a seal that keeps the inside from turning to mush.
When fries thaw, the ice melts and soaks right back into the potato instead of flashing off as steam the second it hits heat. You end up with waterlogged, greasy fries that taste heavy. The industry even has a name for the mistake: slacking. Whether you are using the oven or the air fryer, going straight from freezer to heat is what protects that fluffy interior. Pull them out, toss them with seasoning if you want, and get them on that hot pan fast while they are still rock solid.
Spread Them Out Like You Mean It
A hot pan buys you nothing if you bury it under a mountain of fries. When fries touch or pile up, they trap steam between them, and steam is the enemy of crunch. You want a single layer with a little breathing room around each piece. One cook I trust uses a two-finger test: if you cannot fit two fingers between the fries, the pan is too crowded.
If your batch is too big for one sheet, use two. I know it means more dishes, but a crowded pan will steam every time and undo all your good work. It is fine if a few fries touch, just do not stack them. If you want to get fancy, setting a wire rack on the sheet lets hot air circulate under the fries so you barely have to flip them. Either way, spacing matters as much as heat.
A Little Oil And A Splash Of Vinegar
Most frozen fries are already partly fried in oil at the factory, which is why you do not have to double fry them at home. But a director of culinary at a major fry company says a light spritz of oil before baking helps them brown up beautifully. The fat also gives spices something to cling to. A tablespoon of olive oil is plenty for a whole bag. If you want richer flavor, beef tallow or duck fat are worth a try.
My favorite oddball tip is a teaspoon of vinegar. It sounds strange, but it adds a bright tang like the fries you get with fish and chips, and it actually helps dry the surface and firm them up. Toss your cold fries with the oil, vinegar, paprika, garlic powder, and pepper right before they go on the hot pan. Save the salt for after they come out. Salting raw frozen fries pulls out moisture and just slides off the icy surface anyway.
The Temperature Trap Most People Fall Into
Here is a sneaky problem. Your oven light clicks off before the oven is truly at temperature. Many ovens hit only about 80 percent of the target when that light first turns on, then keep climbing for another five to ten minutes. If the bag says 425 degrees but your oven is really running at 340, those printed cook times mean nothing and your fries limp out. Wait an extra five minutes after the light comes on, or grab a cheap oven thermometer for about ten bucks and see what is really happening in there.
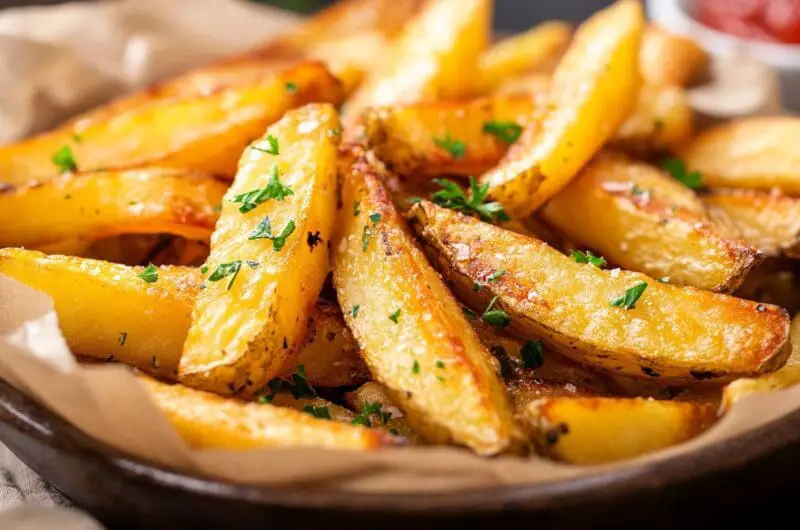
McCain, one of the biggest frozen fry brands out there, lists 425 degrees for its classic cut fries: bake 12 minutes, flip, then bake another 12 to 16 minutes to light golden color. Start checking a couple minutes before the minimum time, then keep going in two-minute bumps until they look toasty on the edges. Perfect fries are golden all over and sound crisp when you tap them with tongs.
Does The Air Fryer Change Anything
Same rules, smaller box. Preheat the air fryer so the chamber is already hot, keep the fries frozen, and never crowd the basket. The blast of moving hot air is what crisps them, so cook in one layer and shake the basket halfway through. McCain suggests 360 degrees for 12 to 13 minutes. Thicker cuts like steak fries and wedges will take longer, so watch the color and pull them when they look right.
One more thing that applies no matter how you cook them: fries are a fleeting joy. They start softening the moment they cool. Season them the second they come out, then serve them right away while they still snap. Do all this, starting with that hot pan, and you will never go back to the sad soggy version again.
Extra Crispy Oven-Baked Frozen Fries
Course: Side DishCuisine: American4
servings5
minutes26
minutes280
kcalThe hot-pan trick that turns any bag of frozen fries golden and crunchy every single time.
Ingredients
1 bag (about 28 oz) frozen fries, kept frozen
1 tablespoon olive oil
1 teaspoon white vinegar
1/2 teaspoon paprika
1/2 teaspoon garlic powder
1/4 teaspoon black pepper
Kosher salt, to taste (added after baking)
Cooking spray, for the pan
Grated Parmesan or chopped parsley, to finish (optional)
Directions
- Place a rimmed baking sheet on the middle rack and preheat your oven to 425 degrees. Once the oven light clicks off, let the empty pan keep heating for another 5 minutes so it gets truly hot.
- In a large bowl, toss the still-frozen fries with the olive oil, vinegar, paprika, garlic powder, and black pepper. Work quickly so the fries stay as cold as possible and coat evenly.
- Carefully pull the hot pan out and hit it with a quick shot of cooking spray. Spread the fries in a single layer with a little space around each one. You should hear a satisfying sizzle the moment they land.
- Slide the pan back in and bake for 12 minutes. If your batch is large, use two pans instead of crowding one so the hot air can move freely.
- Flip the fries with a spatula and rotate the pan 180 degrees for even browning. This is your chance to break up any that stuck together.
- Bake another 12 to 16 minutes, checking around the 12-minute mark. Keep going in 2-minute intervals until the fries are golden all over with toasted edges.
- Tap a fry with your tongs. It should sound crisp and snap when you break it in half to show a fluffy inside. If they need more crunch, broil for 1 to 2 minutes and watch them closely.
- Season with kosher salt right away while the fries are piping hot, then finish with Parmesan or parsley if you like. Serve immediately before they lose their crunch.
Notes
- For a lower and slower start, bake at 375 degrees for 10 minutes to keep the inside creamy, then crank to 475 degrees to blast the outside crisp.
- A wire rack set on the baking sheet lets air circulate underneath so you can skip flipping in a convection oven.
- To revive leftover fries, mist them with a little oil and heat in the air fryer at 390 degrees for 5 minutes.
Frequently Asked Questions
Q: Should I really preheat the baking sheet, or is preheating the oven enough?
A: Preheat both. The oven alone still leaves you with a cold pan, and that cold metal makes the fries thaw and steam before they crisp. A hot pan starts browning the fries the instant they touch it, which is the whole trick.
Q: Is it ever okay to thaw frozen fries first?
A: No, unless a specialty product is designed for it. Thawing lets melted ice soak back into the potato, which makes the fries greasy and mushy. Cook them straight from the freezer every time for the best texture.
Q: Why are my fries always soggy no matter what?
A: It is almost always a crowded pan or an oven that is not fully heated. Spread the fries in one layer with space between them, and give the oven those extra minutes to reach the real temperature before the fries go in.
Q: When should I add the salt?
A: After baking, while the fries are still hot. Salting them frozen pulls out moisture and stops browning, plus the salt barely sticks to an icy surface and mostly falls onto the pan.

