

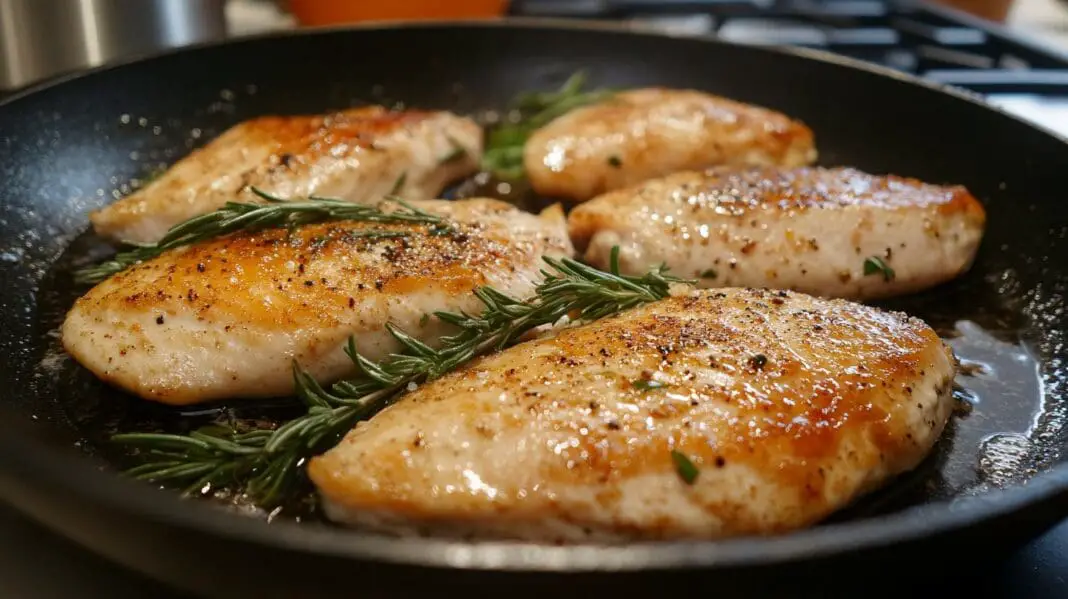
You buy the big value pack of boneless, skinless chicken breasts, you follow the recipe minute for minute, and dinner still comes out with one end juicy and the other end like a dish sponge. It is not the brand you bought. It is not your pan, either.
The fix is about ten minutes of real work and costs whatever kosher salt costs. Dissolve salt in cold water, drop the chicken in, cover it, and leave it in the fridge while you get on with your day. A wet brine is the one step that stands between a Tuesday night chicken breast and one that tastes like it came out of a restaurant kitchen.
Why Breast Meat Turns To Sawdust
A chicken breast is the pectoralis major, the big muscle on either side of the keel bone, and it is wedge-shaped. That shape is the whole problem. The thin end hits done several minutes before the thick end does, so by the time your thermometer is happy at the center, the tail of the breast has been overcooked for a while.
There is no marbling in a breast and almost no connective tissue. Nothing melts, nothing bastes it from the inside. Past about 150°F the muscle fibers tighten hard and squeeze out the water they were holding, and the loss speeds up from there. The window between juicy and chalky is narrow, and no amount of butter in the pan makes up for crossing it.
One more thing worth knowing: if the raw fillet feels hard and stringy under your fingers and cooks up rubbery no matter what you do, that is woody breast, a muscle condition in fast-growing commercial broilers. Slower-growing and heritage birds show it less. Brining will not fix that one.
What The Salt Water Is Actually Doing
Salt dissolves some of the muscle proteins and loosens the fibers, so the meat takes on a little water and, more importantly, holds onto more of it while it cooks. Cooked to the same internal temperature under the same conditions, brined chicken holds onto noticeably more of its juice than unbrined chicken.
That is measurable, not magical. Most home cooks would describe it as slightly juicier. What it really buys you is margin. A brined breast does not fall off the cliff the moment it runs a few degrees past done, the way a plain one does, so the extra two minutes you spent answering the door stop being a disaster.
The seasoning goes deeper than a sprinkle of salt on the surface, though not as deep as people think. Brine still is not a marinade. If you want the chicken to taste like garlic and thyme, you put garlic and thyme in the water and you accept that most of the flavor lives near the surface. A rub or a sauce afterward is still doing the heavy lifting.
The Ratio Worth Memorizing
Four cups of cold water to three tablespoons of Diamond Crystal kosher salt, about 26 grams, or two tablespoons of Morton kosher, whisked until you cannot see a crystal. Add a tablespoon of sugar if you want the chicken to brown properly, which you probably do. That is the whole formula, and it scales up as long as you keep the ratio.
Salt brand matters more than most recipes admit, because crystal size changes what fits in a spoon. Morton kosher packs nearly twice as much salt into a tablespoon as Diamond Crystal, so if your box says something else, weigh it. Table salt is denser than kosher, so a straight swap by volume will land you somewhere you did not want to go.
Brine recipes out there run from gentle to very salty. This one sits on the gentle side, which is why a few hours works without the chicken tasting cured. Weaker brines need more time, stronger brines need less.
How Long To Leave It In
Two to four hours is the sweet spot for boneless, skinless breasts, and six hours is the outer limit. Thirty minutes still makes a noticeable difference if that is all the time you have, which makes this worth doing even when you started dinner late.
Cooks do not fully agree here. Some recipes call for soaks of 12 to 24 hours, even for breasts, and a whole bird in a mild brine can happily go overnight. A naked boneless breast does not take it well. Leave one in salt water overnight and the texture goes spongy and faintly ham-like, a little cured and springy instead of like roast chicken.
My verdict: brine boneless breasts in the afternoon and cook them for dinner. If you want to prep the night before, brine for up to four hours, pull the chicken out, pat it dry, and let it sit covered in the fridge until you cook it. The clock stops when the chicken leaves the water.
Do Not Rinse It
Plenty of older recipes still say to rinse after the brine to knock off surface salt. Skip it. The USDA advises against washing raw poultry at all. Running raw chicken under the tap sprays water around your sink and washes away the seasoned surface you just spent hours building. Paper towels do a better job anyway.
Pat every side very dry, and mean it. A wet surface steams instead of browning, and a brined breast that steams in the pan is a sad, pale thing. If you have twenty spare minutes, set the patted-dry breasts on a rack in the fridge, uncovered, while the pan heats.
Go very light on any additional salt. The meat is already seasoned from the inside out, so your usual pinch is now a double dose. Herbs, pepper, paprika, garlic powder, all fine. One thing to watch at the store: plenty of packaged chicken arrives already pre-seasoned or pre-brined, and brining that gives you chicken nobody wants to eat. Read the label before you dunk it.
Cook It To A Number, Not A Timer
Brine buys margin, and a thermometer is what keeps you from spending it. Pull the breast at 160°F and let it rest five minutes, and it will usually creep up a few more degrees. USDA tables rate chicken held at 160°F for about 15 seconds as safe as 165°F, but if you are cooking for anyone pregnant, older or immunocompromised, take it to 165°F. Measure the thickest part, not the middle of the pan, and not the skinny end.
Pan-searing is the best use of a wet-brined breast. The heat plus the sugar from the brine gives you a crisp, golden crust that plain chicken rarely manages. Sear hard on the first side, then drop the heat and finish it slower rather than blasting it the whole way through. Roasting, grilling, and the air fryer all work too.
If the breasts you bought are monsters, over about 10 ounces each, cut them horizontally into two thinner cutlets before brining. Uneven thickness is the original sin here, and pounding or splitting fixes it permanently. Bone-in, split breasts are the more forgiving version if you can find them, since the bone slows heat to the center and the skin shields the surface.
When A Dry Brine Makes More Sense
Salt rubbed straight onto the meat, no water involved, is the other route. A dry brine pulls moisture to the surface, where it dissolves the salt and gets drawn back in, so the outside dries out and the inside stays seasoned. That dry exterior is exactly what you want for crisp skin.
Use roughly half a teaspoon to a teaspoon of kosher salt per pound and give chicken pieces anywhere from a couple of hours to 12 in the fridge, whole birds 8 to 24. Dry brining is more forgiving on timing because there is no salt bath sitting there relaxing the proteins hour after hour.
The choice comes down to what you are cooking. Wet brine for lean, skinless cuts where moisture is the whole ballgame. Dry brine when there is skin on the bird and you want it to shatter. Either way, thaw the chicken completely first. Salt cannot work its way evenly into something still frozen in the middle.
The Meal Prep Payoff
Sunday chicken that is still edible on Wednesday is the real argument for this step. Brined breasts reheat far better than plain ones because they started with more water in them. Cooked chicken keeps in an airtight container in the fridge for up to 4 days and freezes well for up to 3 months.
Reheat in a skillet over low heat with a splash of water or broth rather than blasting it in the microwave. Slice it cold for salads and wraps, where the seasoning that went all the way through instead of sitting on the outside actually shows up.
Brining will not save chicken you walked away from at 175°F. It will save the chicken you cooked two minutes too long, which, if we are honest, is most of the chicken any of us cook. Ten minutes and a bowl of salt water is a cheap price for that.

Wet-Brined Pan-Seared Chicken Breast
Course: Main DishCuisine: American4
servings10
minutes15
minutes350
kcalThe saltwater soak that turns cheap boneless breasts into chicken that actually stays juicy.
Ingredients
4 boneless, skinless chicken breasts (6 to 10 ounces each)
4 cups cold water (filtered if you have it)
3 tablespoons Diamond Crystal kosher salt (or 2 tablespoons Morton kosher)
1 tablespoon sugar (optional, for browning)
2 garlic cloves, smashed
6 sprigs fresh thyme
4 to 6 black peppercorns
2 tablespoons neutral oil, such as canola or avocado
1 tablespoon butter
Directions
- Whisk the cold water, kosher salt, and sugar together in a medium bowl until you cannot see any crystals at the bottom, which takes about 2 minutes. If the salt is stubborn, dissolve it in a small amount of warm water first, then add the rest of the water cold. The brine has to be fully cool before the chicken goes in.
- Add the smashed garlic, thyme sprigs, and peppercorns to the brine. Use a food-grade plastic container, a glass bowl, a pitcher, or a zip-top bag. Skip aluminum bowls, which can react with the brine.
- Slide the chicken breasts in and make sure every one is fully submerged. If any are thicker than about an inch at the fat end, cut them horizontally into two thinner cutlets first so they cook evenly. Set a small plate on top if the chicken keeps floating.
- Cover the container with a lid or plastic wrap and refrigerate for 2 to 4 hours, and no longer than 6. Never leave chicken brining on the counter. Even 30 minutes helps if that is all the time you have before dinner.
- Lift the chicken out of the brine and pour the brine down the drain. Do not rinse the breasts. Pat them very dry on all sides with paper towels, pressing rather than wiping, because a dry surface browns and a wet one steams.
- Season lightly with black pepper and any herbs or spices you like. Go easy on additional salt or skip it entirely, since the brine already seasoned the meat all the way through.
- Heat the oil in a heavy skillet over medium-high until it shimmers. Lay the breasts in smooth side down and sear hard without moving them for 4 to 5 minutes, until deeply golden. Add the butter, flip, and drop the heat to medium-low to finish.
- Cook until an instant-read thermometer in the thickest part reads 160°F, spooning the butter over the top as it finishes. Move the chicken to a board and rest it for 5 minutes, during which it will climb a few more degrees. Slice against the grain and serve.
Notes
- If 4 cups of brine does not cover all four breasts, mix a second batch at the same ratio of 3 tablespoons Diamond Crystal kosher salt per 4 cups water. Do not just top it off with plain water, which weakens the brine.
- Salt brands are not interchangeable by volume. Three tablespoons of Diamond Crystal Kosher Salt weighs about 26 grams, so weigh your salt if you are using a different brand, and cut back if you only have table salt.
- Cooked chicken keeps in an airtight container in the fridge for up to 4 days and freezes for up to 3 months. Reheat in a skillet over low heat with a splash of water or broth.
Frequently Asked Questions
Q: Can I brine chicken breasts overnight?
A: Not boneless, skinless ones. Past about 6 hours the salt keeps relaxing the proteins long after the moisture benefit has already happened, and the texture turns spongy and faintly ham-like. A whole bird in a mild brine can go overnight, but a naked breast does best at 2 to 4.
Q: Do I need to rinse the chicken after brining?
A: No. Rinsing splashes raw chicken water around your sink and washes off the seasoned surface. Take the breasts straight out of the brine and pat them very dry with paper towels, which does a better job of prepping them to brown.
Q: Can I brine chicken straight from the freezer?
A: Thaw it completely first. Salt cannot work its way in evenly while part of the breast is still frozen, and you lose any control over the brining time.
Q: Is the sugar necessary?
A: The chicken will still be juicy without it. Sugar is there to balance the salt and help the surface caramelize, so if you want a golden crust out of the skillet, leave it in.

