

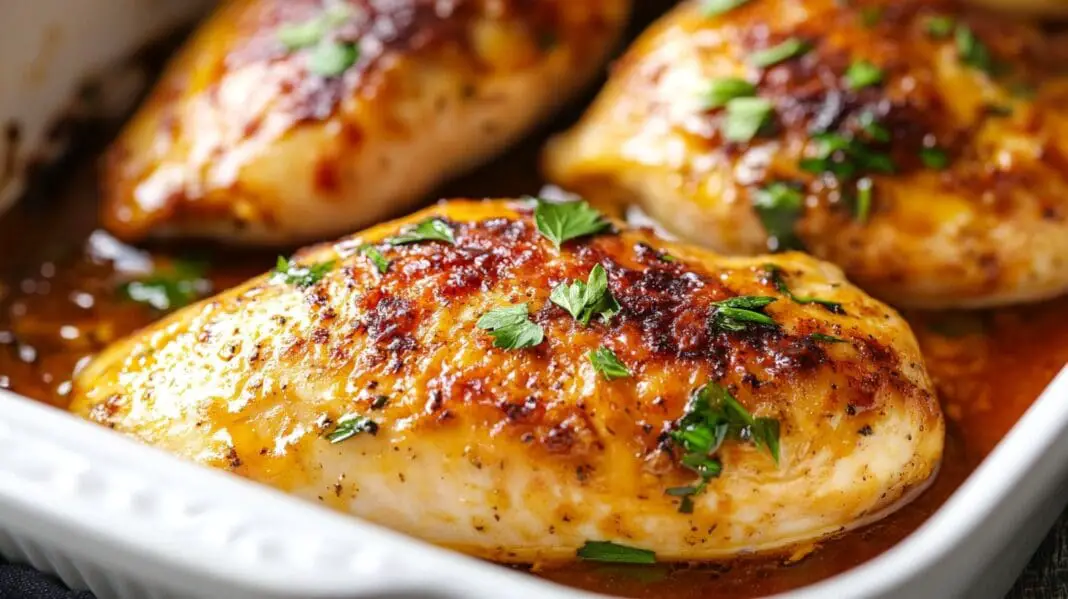
It’s 5:40 on a Tuesday, the chicken is a solid brick, and the fridge thaw you meant to start this morning never happened. Hot water in the sink is a mess. Microwave defrost cooks the thin end while the middle is still ice. Delivery is forty dollars and an hour away. None of that has to happen, because a frozen boneless skinless chicken breast can go from the freezer into the oven without thawing and still come out juicy, as long as you cover the dish with foil for most of the bake.
The USDA says cooking chicken from the frozen state in the oven or on the stove is fine, and that it takes about 50 percent longer than cooking thawed chicken. The number that matters is 165°F in the thickest part, measured with a thermometer. Everything else in this recipe exists to get you there without squeezing the water out of the meat on the way.
Why Frozen Chicken Usually Bakes Up Dry
Baking is dry heat. A thawed breast is in and out in 20 minutes or so, but a frozen one sits in that hot, dry air for 45 minutes or more, and every extra minute is another minute of moisture leaving the meat. That is the whole reason frozen chicken has a bad reputation, not the freezing itself.
The fix is to stop baking it, at least at first, and steam it instead. Covering the dish tightly with aluminum foil traps the moisture coming off the chicken and turns the pan into a little steam oven. The breast comes up to temperature in wet heat, then you pull the foil off for the last stretch so the outside browns and the seasoning tightens into a crust. Recipe developers who bake frozen breasts this way land on the same pattern: covered first, uncovered last, and the meat stays moist.
The Method, Start To Finish
Heat the oven to 350°F. Line a baking dish with foil and grease it with a little oil or cooking spray, mostly so you are not scrubbing a pan at 9 p.m. Lay the frozen breasts in a single layer with a little space between them.
Brush them with olive oil, sprinkle seasoning over both sides, then pour melted butter over the top. Two fats sounds like overkill and it is not. The oil helps the spices grab onto a slick frozen surface, and the butter melts down into the pan and bastes the meat while it cooks.
Cover the dish tightly with foil and bake 35 to 45 minutes. Pull the foil off and give it another 10 to 15 minutes, until the thickest part hits 165°F. Thick breasts can need closer to 55 or 60 minutes total; thinner ones can be done at 40 to 45. Let the chicken rest about 5 minutes before you cut it, because slicing straight out of the oven dumps the juice onto the cutting board instead of leaving it in the chicken.
The Thermometer Is Not Optional Here
Frozen chicken breasts are wildly inconsistent in size, and a timer cannot see that. An instant-read thermometer in the thickest part is the only thing that tells you the truth. Pink color near the bone or in the center is not a reliable sign either way.
The last stretch goes quicker than you’d expect. Once the thermometer reads somewhere in the 130s, the final 25 degrees or so can come on in a few minutes, especially in a hot oven or an air fryer. That is the window where a juicy breast turns into a dry one while you load the dishwasher. Start checking every few minutes from that point and pull each piece the moment it reads 165°F, rather than waiting on the biggest one in the pan.
If you want more browning and a shorter bake, a 425°F oven also works with the same oil and butter treatment, uncovered, checked at 30 minutes and then every 5 to 10 after that. Those thick Kirkland breasts from Costco run about 45 minutes in a hot oven. The hotter the oven, the less forgiving it is, which is why the covered 350°F version is the one I hand to people who are new to this.
When The Breasts Are Stuck In One Frozen Block
A clump of chicken welded together will not cook evenly, and prying at it cold is how people end up at urgent care with a knife wound. Set the sealed bag in a bowl of cold tap water for 5 to 10 minutes and the outsides loosen enough to ease the pieces apart with a fork or a butter knife. You’re after separate pieces, not thawed ones, so get them into the pan while they’re still frozen solid.
Leave about half an inch to an inch between pieces on the pan. Crowded chicken steams into itself in a bad way and cooks unevenly. If you buy the big bags of individually frozen breasts, this problem mostly disappears, and if you freeze your own, lay them flat on a sheet pan first and bag them once they are hard.
Getting Seasoning To Stick To A Frozen Breast
Dry spices bounce off ice. Oil first, then season, and it holds. Bold blends work better than delicate ones, because the cold start mutes anything subtle. Italian seasoning is the default in my house, but garlic powder with onion powder, dried rosemary and thyme is just as good, and taco seasoning with chili powder, cumin and smoked paprika turns the leftovers into burrito bowls.
One trick from air fryer cooks carries over to the oven nicely: salt the frozen breasts at the start, and wait to add the oil and the rest of the spices until the surface has softened a little in the heat. The spices then stay put, brown properly and release their aroma instead of scorching on an icy surface.
Sauce goes on late. BBQ, teriyaki, honey mustard and sweet chili all burn if they ride along for the whole bake. Brush them on in the last 15 minutes in the oven, or the last 3 to 4 minutes in an air fryer, and you get glaze instead of carbon.
If You’d Rather Use The Air Fryer
Same chicken, same frozen start, faster dinner. Preheat to 400°F, even if your machine has no preheat button, then run the breasts for about 30 minutes total, flipping at the 15 minute mark. Cook times land between 25 and 40 minutes depending on size: 6 to 8 ounce breasts around 25 minutes, 8 to 10 ounce breasts 28 to 32, and 10 to 12 ounce monsters 35 to 40.
Most breasts are thick on one end and thin on the other, which is why the skinny end comes out rubbery. Testers who cook frozen breasts in the basket solve it by cutting the thin end off partway through once it hits 165°F and letting the thick end keep going. It feels fussy the first time and then you do it forever.
Three Mistakes That Ruin It
Do not put frozen chicken in the slow cooker. The USDA tells people to thaw meat and poultry before it goes in, because a frozen piece spends too long between 40°F and 140°F before the crock gets hot enough to matter. The oven holds a high enough temperature to cook it through from frozen; a slow cooker does not.
Do not cut into the chicken to check if it is done. Every slice is juice on the board. Use the thermometer.
Do not skip the rest. Five minutes is enough. A loose tent of foil works, but wrapping each piece snugly in foil for those 5 minutes makes a noticeable difference in how tender it slices. It is the cheapest step in the recipe and the one people skip when they are hungry.
What To Do With It Once It’s Cooked
Sliced over a garden salad or a Caesar, piled on mashed potatoes, chopped into pasta, shredded into enchiladas or chicken salad sandwiches, it all works. Roasted green beans and carrots or a pan of skillet potatoes can share the oven while the chicken bakes, which is the point of a weeknight dinner that needs no planning.
Cook a few extra breasts while the oven is on. Cooled and sealed in an airtight container, the cooked chicken keeps 3 to 4 days in the fridge and up to 4 months in the freezer if you wrap it tightly. Reheating in an air fryer for 4 to 5 minutes at 375°F beats the microwave, though a damp paper towel over the top and 30 to 90 seconds will do in a pinch. Either way, the USDA wants leftovers back up to 165°F, so give it a quick check with the thermometer.
The verdict after cooking it both ways more times than I can count: the covered oven method is the one that is hardest to mess up, and it is worth keeping a bag of individually frozen breasts in the freezer specifically so you never have to think about thawing again.
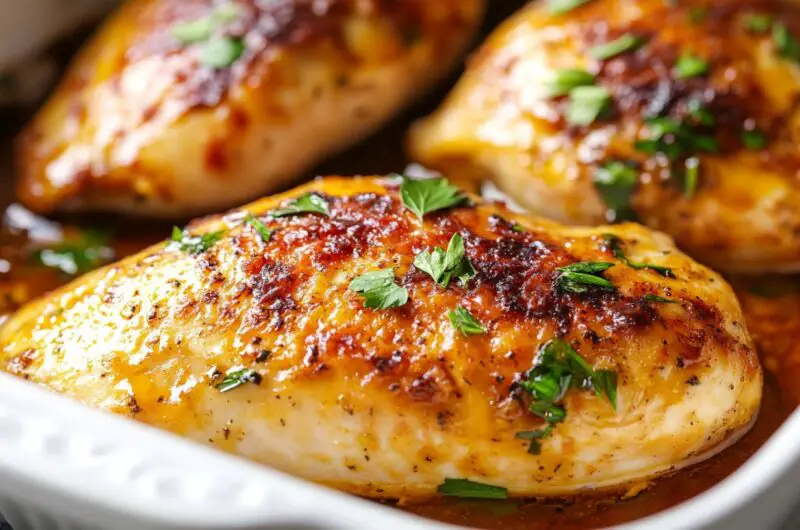
Juicy Baked Chicken Breasts Straight From Frozen
Course: Main CourseCuisine: American4
servings5
minutes50
minutes257
kcalForgot to thaw? These frozen chicken breasts go straight into the oven and come out tender, buttery and anything but dry.
Ingredients
4 frozen boneless skinless chicken breasts, frozen individually and not in one block
2 tablespoons olive oil
2 tablespoons butter, melted
2 tablespoons Italian seasoning
1 teaspoon garlic powder
1/2 teaspoon onion powder
1/2 teaspoon paprika
1 teaspoon kosher salt
1/2 teaspoon black pepper
Directions
- Preheat the oven to 350°F. Line a baking dish with aluminum foil and lightly grease it with cooking spray or a little olive oil so cleanup is easy later.
- Take the chicken out of the freezer. If the breasts are stuck together, set the bag in warm water for about 5 minutes and separate them with a fork or butter knife, but do not let them thaw. They should still be frozen solid going into the oven.
- Arrange the frozen breasts in a single layer in the dish, leaving about half an inch to an inch between each piece. Crowded chicken cooks unevenly and ends up chewy on the thin ends.
- Brush both sides of the chicken with the olive oil. Stir the Italian seasoning, garlic powder, onion powder, paprika, salt and pepper together in a small bowl, then sprinkle it over both sides. The oil gives the spices something to grab onto.
- Pour the melted butter evenly over the tops of the breasts. It will pool in the pan at first and baste the meat as it bakes.
- Cover the dish tightly with foil and bake for 35 to 45 minutes. The trapped steam is what keeps the chicken from drying out while it comes up to temperature from frozen, so make sure the foil is sealed around the edges.
- Remove the foil and bake another 10 to 15 minutes, until an instant-read thermometer reads 165°F in the thickest part. Thicker breasts may need closer to 55 or 60 minutes total, thinner ones as little as 40 to 45. If you want a sauce such as BBQ or teriyaki, brush it on during the last 15 minutes only.
- Move the chicken to a plate and let it rest about 5 minutes before slicing, loosely tented or wrapped in foil. Resting lets the juices settle back into the meat instead of running out onto the cutting board.
Notes
- Freeze chicken breasts in a flat single layer so they do not fuse into a block. This recipe does not work with a solid clump of chicken.
- Go by temperature, not the timer. Thickness varies hugely between bags and brands, and 165°F in the thickest part is the only finish line that counts.
- Cooked chicken keeps 3 to 4 days in an airtight container in the fridge, or up to 4 months in the freezer if wrapped tightly. Reheat in the air fryer for 4 to 5 minutes at 375°F.
Frequently Asked Questions
Q: Can you really bake chicken straight from frozen?
A: Yes. The USDA says chicken can be cooked from the frozen state in the oven or on the stove, and that it takes about 50 percent longer than thawed chicken. The thickest part still has to reach 165°F on a food thermometer.
Q: Can I throw frozen chicken in the slow cooker instead?
A: No. The USDA says to thaw meat and poultry before it goes into a slow cooker, because frozen pieces sit too long between 40°F and 140°F. Use the oven, the air fryer or the stovetop for cooking from frozen.
Q: My breasts are frozen into one solid block. Now what?
A: Set the sealed bag in cold tap water for 5 to 10 minutes, then ease the pieces apart with a fork or butter knife. Get them back in the pan while they are still frozen solid, since the timing assumes a frozen start.
Q: Does this work with other cuts of chicken?
A: It does. Frozen tenders, thighs and drumsticks all bake fine with the same oil, butter and seasoning treatment. Tenders need less time and thighs and drumsticks need more, so check the thickest part for 165°F rather than following the clock.

