
We’ve all experienced that disappointing moment – a broken fried egg with an overcooked yolk stuck to the pan. For years, we’ve been told that preheating is essential for cooking almost everything, including eggs. But what if this conventional wisdom is exactly what’s causing your fried egg frustrations? Professional chefs have a surprising secret: starting with a cold pan. This counterintuitive method produces beautifully intact eggs with perfectly cooked whites and runny yolks that will transform your breakfast experience.
Why starting with a cold pan works better
When you crack an egg into a cold pan with oil and gradually heat it, the proteins in the egg white have time to set slowly rather than immediately contracting when hitting a hot surface. This prevents the dreaded “fried egg sprawl” where whites spread too thin. The entire egg cooks more evenly from bottom to top, with whites setting perfectly while the yolk remains deliciously runny. The technique also prevents edges from burning before the rest of the egg cooks properly.
Another major advantage is that cold starts significantly reduce the chances of breaking the yolk. Without the immediate temperature shock of a hot pan, your egg warms gradually, keeping that golden center intact. Professional chefs note this method creates better texture contrast: tender yet fully set whites with subtly crisp bottoms – perfect for breakfast sandwiches where structural integrity matters. The gradual heating process gives you greater control and a larger margin for error compared to high-heat methods.
The right amount of oil makes the difference
For the cold pan method, you’ll need more oil than traditional techniques – about two tablespoons for a small skillet. This might seem excessive, but it serves multiple crucial purposes. The oil creates a protective layer between egg and pan, preventing sticking as temperature rises. While butter has wonderful flavor, it’s not ideal here because its water content must evaporate before reaching higher temperatures. Instead, use olive oil for rich flavor, or neutral oils like grapeseed or vegetable oil.
The extra oil enables effective basting – a key technique for perfect eggs. As the oil heats, tilt the pan slightly and use a spoon to drizzle hot oil over the egg whites (avoiding the yolk). This cooks the top portions without flipping, resulting in intact sunny-side-up eggs with no raw whites. The oil also acts as a buffer that distributes heat evenly around the egg, preventing hot spots that cause uneven cooking. This more uniform heat distribution is especially important when using the cold pan method.
Temperature control is critical
Start with your pan completely cold, then set your burner to medium-low heat. This gradual warming allows the egg to cook slowly and evenly. Be patient – it may take slightly longer than the hot pan method, but the superior results are worth waiting for. Watch for visual cues during cooking: when the edges of the egg white begin turning opaque, the pan is reaching the right temperature. You’ll notice the whites setting from outside in.
If the oil starts to bubble aggressively around the egg, your heat has likely gotten too high – simply reduce it slightly to maintain gentle cooking. With traditional high-heat methods, the difference between perfectly cooked and overcooked can be mere seconds. The cold pan method slows everything down, providing more control and a greater margin for error. Even if you leave the egg cooking for an extra 30 seconds, it’s much less likely to overcook compared to the hot pan method.
Fresh eggs produce better results
The quality of your eggs significantly impacts how well they fry. Fresh eggs have firmer, more compact whites that hold their shape better during cooking. When shopping, choose Grade AA or A eggs with thicker whites and centered yolks. The fresher the egg, the more pronounced the difference between thick and thin albumin (egg white), resulting in fried eggs that stay compact rather than spreading across the pan. This is why farm-fresh eggs often produce more visually appealing results.
For optimal results, bring eggs to room temperature by taking them out 15-20 minutes before cooking. Room temperature eggs cook more evenly than cold ones straight from the refrigerator. The yolks are less likely to break, and the whites spread less. Combined with the cold pan method, this provides ideal conditions for picture-perfect fried eggs with compact whites and centered yolks. The difference between a fresh egg and one that’s been sitting in your refrigerator for a couple of weeks is immediately noticeable when cooked.
Perfect your egg-cracking technique
Even with the cold pan method, how you crack your egg is crucial. The most common mistake is cracking directly on the pan edge, which increases chances of breaking the yolk or getting shell fragments in your food. Instead, crack on a flat surface like your countertop, creating a clean break without pushing shell fragments into the egg. The flat crack allows you to gently pull the shell apart, maintaining the integrity of the yolk.
For even better results, crack into a small bowl or ramekin first, then gently slide into the oiled pan. This two-step process gives you complete control over how the egg enters the pan and allows you to inspect for and remove any shell fragments. When transferring from bowl to pan, hold the bowl close to the oil surface and let the egg slide out slowly. Don’t drop from height, which can break the yolk on impact. This careful handling virtually guarantees a perfectly formed fried egg.
Creating those crispy, lacy edges
Those delicious crispy edges you see on restaurant eggs are achievable with the cold pan method. As pan and oil gradually heat, the egg white edges naturally bubble and crisp. The slow cooking allows these edges to develop a beautiful golden-brown color without overcooking the rest of the egg. To enhance the effect, use the basting technique: tilt the pan to pool oil, then scoop and drizzle it over the edges of the egg.
For more pronounced crispiness, similar to Thai kai dao or Spanish huevos fritos con puntilla, increase oil to about a quarter inch in the pan. This essentially deep-fries the edges while the center cooks gently. The result is a dramatic contrast between the delicate, runny yolk and the crunchy, browned edges that add both textural interest and enhanced flavor through the Maillard reaction (the same browning process that makes toast so delicious). By adjusting the heat and cooking time slightly, you can achieve anything from a gentle crispness to dramatically crunchy edges.
The basting technique for perfect sunny-side up eggs
One of the biggest challenges with sunny-side up eggs is getting the whites fully cooked on top without flipping the egg and sacrificing that perfect, intact yolk. After your egg has been cooking for a couple of minutes and the whites are beginning to set, it’s time to employ the basting technique that professional chefs swear by. Tilt your pan slightly to create a pool of hot oil on one side. Using a spoon, carefully collect some of the hot oil and drizzle it over the still-translucent parts of the egg white.
Avoid pouring oil directly on the yolk unless you want it to cook through. This basting action essentially cooks the top of the egg without having to flip it, resulting in a perfectly set white with no translucent parts (the most common complaint about sunny-side up eggs). The beauty of basting with the cold pan method is timing – since the egg and oil heat up gradually together, the oil reaches the perfect temperature for basting just when the egg needs it. The relatively cooler oil cooks the top of the whites gently, preventing them from becoming rubbery.
How to safely flip eggs for over-easy perfection
If you prefer over-easy, over-medium, or over-hard eggs, the cold pan method still offers significant advantages, particularly when it comes to the flipping stage. The gradual heating allows the egg white to set more completely before flipping, making it less likely to break apart during turning. Wait until the whites are almost completely set and only a small portion on top remains translucent. You’ll notice the edges starting to curl slightly – this is your cue that it’s ready to flip.
For the flip, use a thin, wide spatula that can slide completely under the egg. Plastic or silicone spatulas often work best on nonstick surfaces. A quick, confident wrist motion works better than a hesitant, slow flip. After flipping, many chefs recommend sliding the pan off the heat completely, letting residual heat finish cooking the top side. For over-easy eggs, this might mean just 5-10 seconds on the flipped side; for over-medium, about 15-30 seconds; and for over-hard, around 45-60 seconds.
Choosing the best pan for the method
The pan you choose plays a crucial role in the success of the cold pan egg method. Nonstick pans are generally the top choice. They require less oil to prevent sticking, distribute heat evenly, and make the egg-release process virtually foolproof. A good quality nonstick pan with a heavy bottom provides the consistent heating that’s ideal for the gradual temperature increase this method relies on. If you prefer to avoid nonstick coatings, a well-seasoned cast iron skillet or carbon steel pan can work wonderfully, though you’ll need slightly more oil.
Size matters when selecting your pan. A smaller pan (8-10 inches) works better than a large one, as it keeps the egg whites from spreading too much and concentrates the oil in a smaller area for more effective basting. If cooking multiple eggs, it’s better to use a medium-sized pan and cook in batches rather than crowding a large pan, which can lead to uneven cooking and eggs that run together. One hidden benefit of the cold pan method is that it’s gentler on your cookware. The gradual heating prevents thermal shock that can warp thinner pans over time.
Seasoning at the right moment
Timing is everything when it comes to seasoning your eggs. Many cooks make the mistake of salting eggs too early, which can break down the proteins in the whites and make them spread more thinly in the pan. With the cold pan method, it’s best to wait until the whites begin to set before adding salt. This allows the proteins to coagulate properly first, maintaining that desirable compact shape. Salt should be applied lightly and evenly across the egg whites, with just a tiny pinch over the yolk if desired.
The type of salt matters too – fine sea salt or kosher salt distributes more evenly than coarse salt. Pepper is traditionally added after cooking to prevent high heat from burning it and creating bitter flavors. However, with the cold pan method’s gentle heating, it’s actually fine to add freshly ground black pepper during cooking if you prefer. The cold pan’s gentle cooking environment helps preserve the delicate flavors of seasonings better than the harsh environment of a hot pan.
The cold pan egg method challenges conventional cooking wisdom, but it addresses the most common fried egg frustrations. By starting with a cold pan and the right amount of oil, gradually bringing up the heat, and using careful techniques for cracking, basting, and flipping, you’ll achieve consistently perfect results. Whether you prefer sunny-side up with crispy edges or over-easy with a perfectly runny yolk, this simple trick will transform your breakfast routine. Sometimes, the path to perfection requires rethinking the basics. Try it tomorrow morning – your breakfast plate will never look the same again.
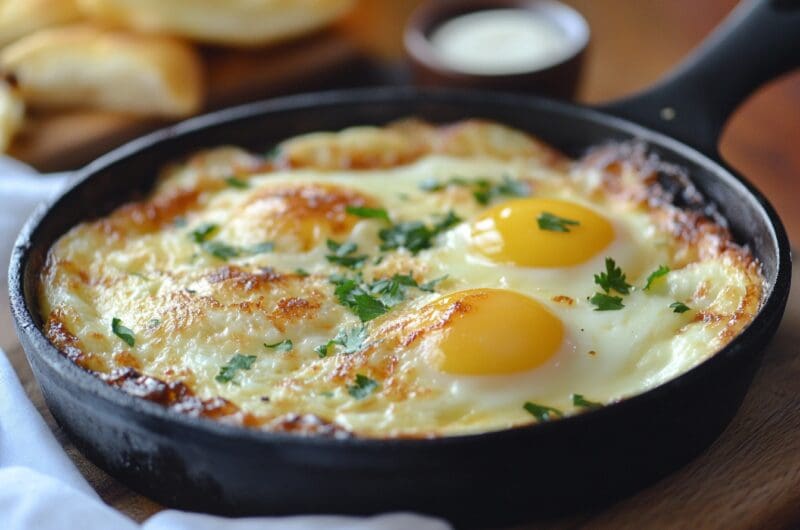
Perfect Cold Pan Fried Eggs
Course: BreakfastCuisine: American2
servings2
minutes7
minutes180
kcalDiscover the game-changing technique that professional chefs use for creating flawless fried eggs with crispy edges and runny yolks every time.
Ingredients
2 large fresh eggs (preferably Grade A or AA)
2 tablespoons olive oil (or other high-quality oil like grapeseed or avocado)
Fine sea salt, to taste
Freshly ground black pepper, to taste
Optional toppings: fresh herbs, hot sauce, chili crisp, etc.
Directions
- Allow your eggs to come to room temperature by removing them from the refrigerator 15-20 minutes before cooking. This will help them cook more evenly and reduce the likelihood of the yolks breaking. If you’re in a hurry, you can place the eggs in a bowl of warm (not hot) water for about 5 minutes.
- Pour the olive oil into a cold, small nonstick skillet (8-10 inches). Don’t preheat the pan at all – this is the key to the method. The cold start allows the whites to set gradually without immediately contracting, which prevents spreading and creates a more compact, perfectly formed egg.
- Crack each egg into a small bowl or ramekin first, rather than directly into the pan. This allows you to check for shell fragments and gives you more control when adding the egg to the pan. Hold the bowl close to the oil surface and gently slide the egg in, being careful not to break the yolk.
- Place the cold pan with eggs and oil over medium-low heat. Don’t be tempted to increase the heat – the slow cooking process is essential for perfect results. You’ll gradually see the edges of the egg whites begin to turn opaque as the pan warms up, with the whites setting from the outside in.
- After about 3-4 minutes, when the whites are mostly set but still slightly translucent on top, it’s time to baste the eggs. Carefully tilt the pan to pool some of the hot oil to one side, then use a spoon to scoop up the oil and drizzle it over the whites (avoiding the yolk if you want it to remain runny). This cooks the top portion of the whites without having to flip the egg.
- Continue cooking and basting for another 1-2 minutes until the whites are completely set but the yolk is still runny. If you prefer your eggs over-easy, you can now flip them using a thin spatula. For over-easy eggs, cook for just 5-10 seconds after flipping; for over-medium, cook 15-30 seconds; for over-hard, cook 45-60 seconds.
- For crispier edges, allow the edges to sizzle slightly longer in the oil. You can direct more oil toward the edges using your spoon to create that restaurant-style lacy, golden-brown crispiness. Watch carefully to ensure they don’t become too dark or crispy.
- Once the eggs are cooked to your preference, carefully slide a spatula underneath and transfer them to your serving plate. Season with fine sea salt and freshly ground black pepper right before serving. Add any optional toppings like fresh herbs, hot sauce, or chili crisp if desired. Serve immediately while hot.
Notes
- For the best results, use the freshest eggs possible. Fresh eggs have firmer whites that hold their shape better during cooking.
- While a nonstick pan is ideal for this method, you can also use a well-seasoned cast iron or carbon steel pan. Just be aware that you might need a bit more oil to prevent sticking.
- If cooking multiple eggs, consider cooking them in batches rather than overcrowding the pan, which can lead to uneven cooking.
- Wait to salt your eggs until the whites begin to set to prevent the salt from breaking down the proteins too early, which can cause the whites to spread.
- For an extra flavor boost, try infusing your oil with aromatics like garlic, herbs, or chili flakes before adding the eggs.
Frequently Asked Questions About the Cold Pan Egg Method
Q: Why is starting with a cold pan better than a hot pan for fried eggs?
A: Starting with a cold pan allows the egg proteins to set slowly and evenly, which prevents the whites from spreading too thin and reduces the chance of breaking the yolk. The gradual heat increase gives you more control over the cooking process, resulting in perfectly set whites and runny yolks without burnt edges. It also provides a larger window of time to achieve perfect doneness, making it more forgiving than high-heat methods.
Q: Is two tablespoons of oil really necessary? It seems like a lot.
A: Yes, the extra oil is a key part of what makes this method work so well. The oil creates a protective layer between the egg and pan, prevents sticking, distributes heat evenly, and allows for the important basting technique that cooks the top of the whites without flipping. You can reduce it slightly, but using less than 1½ tablespoons may compromise your results. The oil also contributes to those desirable crispy edges that make restaurant-style eggs so special.
Q: Can I use butter instead of oil with the cold pan method?
A: Butter isn’t ideal for the cold pan method because it contains water that must evaporate before reaching higher temperatures. Since you’re starting cold, the butter won’t create the protective barrier needed quickly enough. However, if you prefer the flavor of butter, you can use a combination of oil (for its cooking properties) and a small pat of butter (added once the pan has warmed up a bit) for flavor. Clarified butter or ghee would work better than regular butter if you want that buttery flavor.
Q: How do I know when to baste the eggs, and is it really necessary?
A: Basting is the key to getting perfectly set whites on top without having to flip the egg. You’ll know it’s time to baste when the edges of the egg whites are set but the top portion still looks translucent (usually after 3-4 minutes of cooking). Tilt the pan to pool the oil, then spoon it over the whites, avoiding the yolk if you want it runny. If you prefer not to baste, you can also cover the pan with a lid for the last minute of cooking to use steam to set the top of the whites, though this gives a different texture than the oil-basting method.