
The fried egg seems simple enough—crack, cook, eat. Yet most people end up with rubbery whites, burnt edges, and yolks that cook faster than expected. Professional chefs know a secret technique that changes everything: butter basting. This method creates restaurant-quality eggs with crispy edges, tender whites, and perfectly runny yolks. The best part? It requires no special equipment, just butter and oil working together to transform breakfast.
Most people cook eggs way too hot
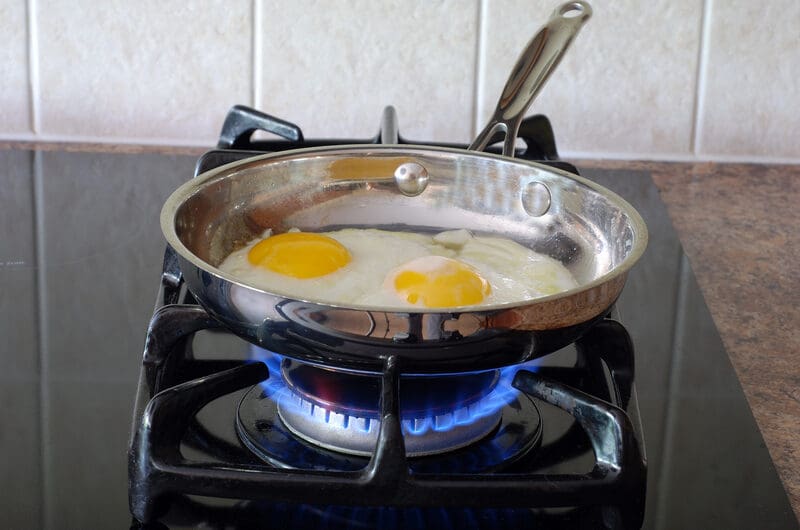
Many home cooks make the same mistake: cranking up the heat to get breakfast done faster. They drop cold eggs into a barely warmed pan and wonder why the edges turn brown and crispy while the centers stay undercooked. High heat causes the proteins in egg whites to seize up quickly, creating that rubbery texture nobody wants. The yolks often overcook before the whites fully set, leaving you with a disappointing breakfast.
Professional chefs take a different approach entirely. They use medium-low heat and give themselves time to cook eggs properly. The ideal temperature sits around 275-300°F, which allows the whites to set gradually from the edges inward. This slower cooking process takes about two minutes total but makes all the difference. The pan should heat for at least two to three minutes before adding any fat. A quick test: flick a tiny water drop onto the surface and watch it dance and evaporate fairly quickly when the pan reaches the right temperature.
Butter and oil together create magic
Using just butter seems like a good idea until it starts burning. Butter tastes amazing but contains milk solids that brown and burn at relatively low temperatures. On the other hand, cooking eggs in only oil works fine but misses that rich, nutty taste that makes restaurant eggs so satisfying. The solution combines both fats to get the best of each world.
The combination technique uses equal parts butter and oil—typically one tablespoon of each for two eggs. Extra virgin olive oil has a higher smoke point and prevents the butter from burning while adding its own subtle taste. European-style butter with higher fat content works best because it foams beautifully when heated. This foam becomes the perfect medium for basting your eggs. Add the olive oil first, then drop in the butter and wait until it melts completely and starts foaming before adding your eggs.
The basting technique changes everything
Here’s where the magic happens. Once your eggs hit the foaming butter, tilt the pan slightly to pool the hot fat mixture on one side. Use a spoon to repeatedly scoop the butter over the whites of the eggs while they cook. This basting action cooks the top surface of the egg whites without flipping them, which means your yolks stay perfectly intact and runny.
The basting process serves multiple purposes at once. It helps cook the whites evenly from both top and bottom, enhances taste by bathing the eggs in hot butter, and creates those coveted crispy edges while maintaining tender centers. The gentle heat ensures the yolks warm through without solidifying. Keep spooning that butter over the whites for about two minutes total, and watch as the translucent parts turn opaque white. The result is a fried egg with fully cooked whites, golden runny yolks, and crispy browned edges.
Room temperature eggs make a difference
Cold eggs straight from the refrigerator cause problems. They lower the pan temperature when they hit the hot fat, leading to uneven cooking. The whites spread too thin across the pan, and the yolks take longer to warm up. Cold eggs also make it harder to achieve that perfect balance of set whites and runny yolks because everything cooks at different rates.
Taking eggs out of the fridge five to ten minutes before cooking makes a noticeable improvement. If time is short, place them in a bowl of warm (not hot) water for a few minutes to take the chill off. Room temperature eggs cook more evenly because they start closer to the final temperature needed. The whites set at a more consistent pace, and the yolks warm gently without overcooking. Always crack eggs into a small bowl or ramekin first, then gently slide them into the pan rather than cracking directly over hot fat.
The right pan matters more than expected
Pan choice affects whether eggs slide out perfectly or stick stubbornly to the bottom. Non-stick pans provide the easiest experience—eggs release cleanly, cleanup takes seconds, and the slightly sloped sides make tilting and collecting butter simple. An eight-inch pan works ideally for one or two eggs, giving them enough room without spreading the butter too thin across a large surface.
Well-seasoned cast iron skillets offer another excellent option. They retain heat beautifully and create wonderfully crispy edges on eggs. The heavier weight means temperature stays more consistent when you add cold ingredients. Cast iron does require proper seasoning to prevent sticking, so make sure the pan has a good coating built up before attempting eggs. Stainless steel pans can work but require more fat and careful attention to prevent sticking. Whatever pan type chosen, ensure it heats evenly without hot spots that cook some parts faster than others.
Timing determines your perfect yolk
Everyone has different preferences for yolk doneness. Sunny-side up eggs with completely runny yolks take about two to three minutes total using the butter-basting technique. The hot fat spooned over the whites cooks them fully without touching the yolk directly. Watch for the whites to turn from translucent to opaque, working from the edges toward the center.
For over-easy eggs, wait until the whites mostly set (about two minutes), then gently flip using a thin, wide spatula. Cook for just ten to fifteen seconds on the second side—barely enough time to create a thin film over the yolk while keeping it runny inside. Over-medium eggs need about thirty seconds after flipping, creating a yolk that’s partly set but still slightly fluid. Over-hard eggs require one to one and a half minutes after flipping for a completely cooked yolk. The water method also works well—adding one teaspoon of water before covering the skillet creates steam that gently cooks the tops.
Seasoning matters more than most realize
Salt and pepper form the foundation, but timing affects how they work. Salting too early breaks down proteins in egg whites, resulting in a watery texture. The best approach either seasons the butter-oil mixture in the pan before adding eggs, allowing seasonings to infuse into the fat, or seasons the eggs directly about thirty seconds before they finish cooking.
Going beyond basic seasonings opens up new possibilities. Smashed garlic cloves, fresh herb sprigs like thyme or rosemary, or a small shallot slice added to the butter as it melts perfumes the fat with complex tastes that transfer to the eggs. Smoked paprika stirred into the butter creates a bacon-like taste without any meat. Toasted cumin seeds provide earthy warmth that pairs beautifully with rich yolks. Red pepper flakes add a gentle kick. For an unexpected twist, add a teaspoon of cream to the butter during basting—it creates an almost custard-like quality in the whites.
Alternative fats create interesting variations
While the butter-oil combination forms the foundation, trying different fats leads to fascinating discoveries. Bacon fat lends smoky depth and a savory quality that regular butter can’t match. Cook bacon in the pan first, remove it, then proceed with eggs in the rendered fat. The bacon taste permeates the eggs without adding any actual bacon pieces.
Ghee (Indian clarified butter) offers a nutty, caramelized taste along with a higher smoke point, making it ideal for the basting technique. Compound butters with herbs, citrus zest, or spices transform morning eggs with minimal effort. Chili crisp or infused oils create textural contrast and heat that cuts through yolk richness. The spicy, crunchy bits in chili crisp add interest to every bite. Duck fat produces incredibly rich, restaurant-quality eggs with a deeper taste than butter or oil alone. Each fat brings its own character while the basting technique remains the same.
Common problems have simple solutions
Eggs sticking to the pan usually means insufficient fat or improper preheating. Make sure to use a full tablespoon each of butter and oil for two eggs and allow the pan to preheat properly before adding any fat. If eggs still stick, the pan might need re-seasoning (for cast iron) or replacement (for non-stick with worn coating).
Whites spreading too thinly across the pan indicate either eggs that are too cold or butter that hasn’t started foaming yet. Room temperature eggs hold their shape better when they hit the pan. Adding eggs when the butter actively foams helps set the whites quickly, preventing excessive spreading. Broken yolks usually result from cracking eggs directly over hot fat or using too much force. Cracking into a small bowl first allows gentler handling and the chance to remove any shell fragments. Slide eggs into the pan slowly rather than dropping them from a height.
The butter-basting technique transforms ordinary fried eggs into restaurant-quality breakfast that impresses anyone at the table. Combining butter and oil prevents burning while maximizing taste, and spooning the hot fat over the whites cooks them perfectly without flipping. Medium-low heat and a bit of patience create eggs with crispy edges, tender whites, and golden runny yolks. This simple method proves that sometimes the smallest changes make the biggest difference in cooking.
Perfect Butter-Basted Fried Eggs
Course: BreakfastCuisine: American2
servings5
minutes3
minutes220
kcalThis chef-inspired technique transforms ordinary eggs into restaurant-quality creations with crispy edges and silky, rich yolks.
Ingredients
2 large eggs, at room temperature
1 tablespoon unsalted butter (preferably European-style)
1 tablespoon extra virgin olive oil
¼ teaspoon kosher salt
Freshly ground black pepper, to taste
Optional: ¼ teaspoon red pepper flakes
Optional: 1 small clove garlic, smashed
Optional: 1 sprig fresh herbs (thyme, rosemary, or sage)
Optional: flaky sea salt for finishing
Directions
- Take your eggs out of the refrigerator at least 5-10 minutes before cooking to bring them to room temperature. This helps them cook more evenly and prevents the whites from spreading too thin in the pan. If you’re short on time, place them in a bowl of warm water for a few minutes.
- Place an 8-inch non-stick or well-seasoned cast iron skillet over medium-low heat and allow it to preheat for 2-3 minutes. To test if the pan is ready, flick a tiny drop of water onto the surface—it should dance and evaporate quickly. The pan should feel warm but not smoking hot.
- Add the olive oil to the preheated pan, swirling to coat the bottom. Immediately add the butter and let it melt completely. If using garlic or herbs, add them now and let them infuse the fat for about 30 seconds. Wait until the butter starts foaming actively before proceeding.
- Crack each egg into a small bowl or ramekin first to check for shells and ensure the yolks are intact. Gently slide the eggs into the pan from the bowl, keeping them close to the surface to prevent breaking the yolks. The whites should start setting immediately at the edges.
- Tilt the pan slightly to pool the foaming butter mixture on one side. Using a spoon, continuously scoop the hot butter over the egg whites, focusing on the areas that still look translucent. Keep basting repeatedly for about 2 minutes, watching as the whites turn opaque from the edges inward.
- About 30 seconds before the eggs finish cooking, season with kosher salt and freshly ground black pepper directly over the eggs. If using red pepper flakes, sprinkle them on now. The whites should be fully set and opaque while the yolks remain bright yellow and jiggly.
- Remove the pan from heat immediately once the whites are fully set but the yolks still look runny. Using a thin, wide spatula, gently slide under each egg to release it from the pan. The eggs should lift easily without sticking if enough fat was used.
- Transfer the eggs to warmed plates immediately to prevent carryover cooking. Finish with a pinch of flaky sea salt if desired and serve right away. The yolks should be perfectly runny when broken, with crispy edges on the whites and tender centers.
Notes
- For over-easy eggs, flip gently after 2 minutes and cook for just 10-15 seconds on the second side.
- European-style butter has higher fat content and creates better foam for basting than regular butter.
- If your butter starts browning too quickly, reduce the heat slightly and add a touch more olive oil.
- Try bacon fat instead of olive oil for a smoky, savory variation.
- Ghee works wonderfully as a substitute for butter and has a higher smoke point.
Frequently asked questions
Q: Can I use salted butter instead of unsalted?
A: Yes, but reduce or skip the added salt since salted butter already contains sodium. Unsalted butter gives you better control over the final seasoning level.
Q: Why do my egg whites spread so thin in the pan?
A: Cold eggs cause this problem. Room temperature eggs hold their shape better when they hit the hot fat. Also, make sure the butter is actively foaming before adding eggs.
Q: How do I know when the pan is hot enough?
A: Flick a tiny drop of water onto the surface after preheating for 2-3 minutes. It should dance and evaporate quickly but not violently sizzle and disappear instantly.
Q: Can I cook more than two eggs at once with this method?
A: It’s possible but challenging to baste effectively. For more than two eggs, use a larger pan (10-12 inches) and increase the butter and oil proportionally to maintain enough fat for basting.