
Most frozen chicken wings end up soggy, rubbery, or just plain sad. The reason? People skip one crucial step before they ever turn on the oven. Parboiling — a quick simmer in salted water — is the secret that separates limp, steamed-tasting wings from ones with golden, crackly skin. It sounds weird to boil something before you bake it, but this trick removes excess fat and sets the stage for seriously crispy results. Here is everything that actually matters when cooking frozen chicken wings.
Thaw them before you do anything else
It is tempting to toss frozen wings straight onto a baking sheet. Plenty of recipes online tell you it works just fine. And technically, it does — your wings will cook through. But the end result is almost always a disappointment. Frozen wings release a ton of water as they cook, and that moisture turns into steam. Steam is the enemy of crispy skin. Instead of browning, the outside of your wings basically gets a sauna treatment. That is why thawing first makes such a huge difference in how they turn out.
The best way to thaw frozen wings is overnight in the fridge. Just move the bag from the freezer to the refrigerator before bed. By the next afternoon, they are ready to go. Short on time? Put the sealed bag in a bowl of cold water. That usually takes a couple of hours. The microwave works too, but only to break apart wings that are stuck together in a frozen clump. Keep the power low and only run it briefly.
Parboiling is the real game changer
Here is the step most people have never heard of. Once your wings are thawed, drop them into a big pot of heavily salted boiling water. Reduce the heat so the water stays at a gentle simmer — not a rolling boil. Let them cook for about seven to eight minutes. This does something amazing. It renders out a bunch of the fat sitting under the skin. That fat is what usually makes oven-baked wings feel greasy and floppy instead of crispy and light.
The salt in the water also seasons the meat from the inside, which is hard to do with just a dry rub. Think of it like salting pasta water — it should taste almost unpleasantly salty, like ocean water. After the simmer, drain the wings in a colander. Let them sit for a few minutes so the steam can escape. This parboiling method has earned hundreds of rave reviews from home cooks who say their wings now beat restaurant quality.
Drying the wings matters more than you think
After parboiling, the wings are wet. If they go into the oven like that, they will stick to the pan and steam instead of crisp. So this next step is not optional. Lay the wings out on a layer of paper towels or clean kitchen towels. Then grab more towels and press down on each wing, giving it a good squeeze. Get as much surface moisture off as you possibly can. It feels a little tedious, but this is the single biggest factor in getting crispy skin.
Some people even go a step further. They set the dried wings on a wire rack and let them air dry in the fridge, uncovered, for up to 24 hours. This is a great trick if you are prepping ahead for a party or game day. The cold, dry air of the fridge pulls even more moisture from the skin. When those wings finally hit the hot oven, they crisp up faster and more evenly. It is worth the extra planning.
Buy party-cut wings to save yourself trouble
Whole chicken wings have three sections — the drumette, the wingette (or flat), and the tip. The tip is mostly skin and bone with almost no meat, so it gets tossed. If you buy whole wings, you have to break them down yourself at each joint with a sharp knife. It is not hard, but it is messy and takes extra time. And if your pieces end up different sizes, they will cook unevenly. Some will be overdone while others are still undercooked in the middle.
The easier move is to buy wings labeled “party style” or “party cut” at the grocery store. These are already separated into drumettes and wingettes, with the tips removed. They are usually pretty uniform in size, which means they all cook and brown at the same rate. Most frozen wing bags from major brands come pre-cut this way. Look for them in the frozen poultry section. This small detail saves time and gives better results every single batch.
High oven heat is what creates the crunch
A lot of chicken recipes call for something like 350°F or 375°F. That is fine for a whole roasted bird. But for wings, you need to crank it up. Set your oven to 425°F or even 450°F. The high heat forces the remaining fat in the skin to render quickly. At the same time, the skin itself dehydrates and tightens, which is what creates that crackly, almost fried feeling. Lower temperatures just do not move fast enough, and you end up with rubbery, chewy skin.
Place the wings directly on a metal sheet pan in a single layer with the fattier side facing down. Do not line the pan with parchment paper or a silicone mat. Those barriers trap moisture underneath and prevent the skin from making direct contact with the hot metal. That contact is what gives the bottom side its golden color. If sticking is a concern, a very light coating of a high smoke point oil like avocado oil or vegetable oil works great.
Flip them once for crispy skin on both sides
Have you ever pulled wings out of the oven and noticed one side is golden brown while the other is pale and soft? That is because the side touching the hot pan gets most of the heat. The solution is simple — flip them. After about 25 minutes in a 450°F oven, use tongs to turn each wing over. You should see golden, caramelized spots on the side that was facing down. Those spots mean the fat is rendering and the skin is crisping up nicely.
After flipping, bake for another five to ten minutes. Keep a close eye on them during this second stretch. Wing sizes vary a lot from brand to brand and store to store. Small wings cook faster, and big ones take longer. Go by what you see more than the clock. The wings are done when both sides look golden and the skin feels tight and crackly. If the inside is dry, they went too long. The meat should still be juicy inside with a thin, crisp shell outside.
Add sauce after baking, never before
This is a mistake people make all the time. They slather wings in buffalo sauce or BBQ sauce before putting them in the oven. The sugar and liquid in the sauce burns and sticks to the pan long before the wings finish cooking. The wings end up charred on the outside and possibly undercooked on the inside. Sauce should always go on after the wings come out of the oven. Toss them in a big bowl with your sauce so every piece gets an even coating.
Want an extra layer of stickiness? After tossing in sauce, put the wings back under the broiler for about two minutes. This caramelizes the sauce slightly and gives the coating a tacky, glossy finish. Then toss them in sauce one more time before serving. The classic choice is buffalo sauce — just mix Frank’s RedHot with melted butter. But honey garlic, BBQ, garlic parmesan, and Asian sesame are all fantastic options too. Match the sauce to your mood.
When to add dry seasoning instead of sauce
Not everyone wants saucy wings. Sometimes a good dry rub is all you need. But timing matters here too. Do not season frozen or raw wings — the spices will not stick properly and the moisture on the surface washes them right off. The best time to add a dry rub is after parboiling and drying. At that point, the skin has a slight tackiness that grabs onto the seasoning and holds it through the baking process. The result is a well-seasoned crust.
Good dry rub combinations are simple. Salt and smoked paprika is a classic. Salt, pepper, garlic powder, and onion powder covers most bases. Lemon pepper with a pinch of dried rosemary is surprisingly great. If you like heat, add cayenne or chili powder. The key is keeping it to four or five ingredients max. Too many spices compete with each other. A simple seasoning blend lets the crispy skin and chicken shine through without getting lost under a pile of powder.
Check the temperature, not just the color
Golden brown skin does not always mean the chicken is cooked through. This is especially important if you started with frozen wings. Even after thawing and parboiling, thicker drumettes can still be pink near the bone. A cheap instant-read meat thermometer takes the guesswork away. Stick it into the thickest part of a drumette without touching the bone. The USDA says chicken is safe at 165°F. That is the number to hit every time, no exceptions.
Here is a helpful trick from the pros. Pull the wings out at about 160°F. As they rest for a few minutes, the internal temperature will rise another five degrees on its own. This is called carryover cooking. Pulling them a touch early keeps the meat from drying out while still hitting the safe zone. A thermometer costs about ten bucks and lasts for years. If you cook any kind of meat at home, it is one of the most useful tools in the kitchen drawer.
The difference between forgettable frozen wings and truly impressive ones comes down to a handful of simple steps. Thaw them first. Parboil in salted water. Dry them like your life depends on it. Bake hot, flip once, and sauce them at the end. None of this is complicated — it just takes a little patience. Once you nail this method, frozen wings become one of the easiest and most satisfying things you can make at home on any night of the week.
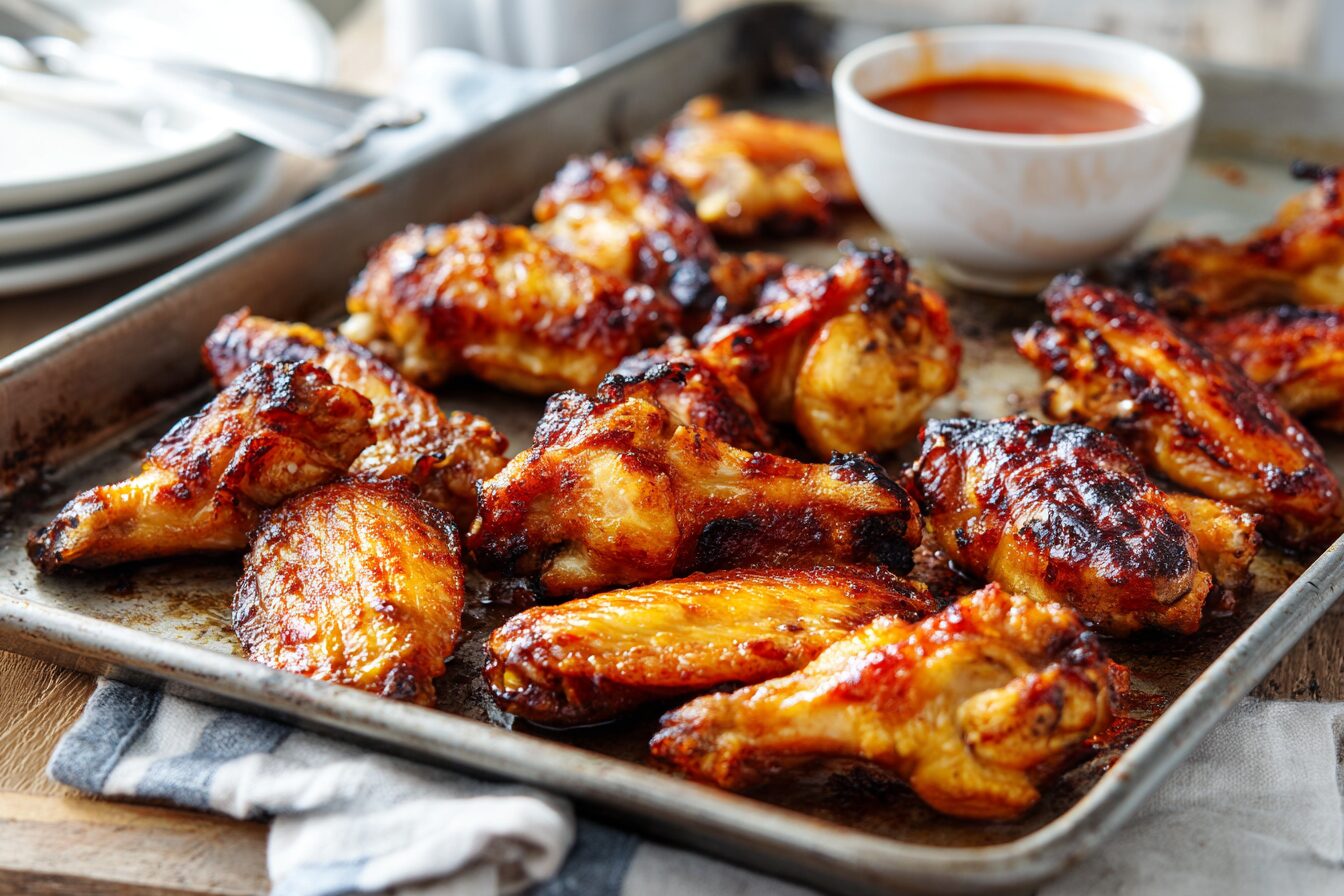
Crispy Parboiled and Baked Chicken Wings
Course: AppetizerCuisine: American4
servings20
minutes40
minutes320
kcalThe secret restaurant trick that turns ordinary frozen chicken wings into golden, crackly perfection without a deep fryer.
Ingredients
2 lbs chicken wings, party style (pre-cut into wingettes and drumettes)
Kosher salt (enough to heavily salt the boiling water)
1 teaspoon avocado oil or vegetable oil (optional, for greasing the pan)
⅓ cup Frank’s RedHot sauce (for buffalo wings)
3 tablespoons unsalted butter, melted (for buffalo wings)
Celery sticks, for serving
Carrot sticks, for serving
Blue cheese or ranch dip, for serving
Directions
- Preheat your oven to 450°F. Fill a large pot with water and bring it to a boil over high heat. Season the water heavily with kosher salt — it should taste almost as salty as sea water. This salt seasons the wings from the inside out.
- Add the chicken wings to the boiling water and immediately reduce the heat to maintain a gentle simmer. Let the wings simmer for 7 minutes. This parboiling step renders out excess fat from under the skin, which is the key to achieving crispy results in the oven.
- Drain the wings into a colander and let them sit for about 3 to 4 minutes. You will see steam rising from the wings as they cool slightly. This resting time allows excess moisture to evaporate naturally before you start drying them by hand.
- Lay the wings out on a layer of paper towels or clean kitchen towels. Press down firmly on each wing and give it a squeeze to remove as much surface moisture as possible. This is the most important step for crispy skin — any water left on the surface will need to cook off in the oven before the skin can start to brown and crisp.
- Place the wings in a single layer directly on a rimmed metal baking sheet with the fattier top side facing down. Do not use parchment paper or a silicone mat. If you are worried about sticking, lightly grease the pan with a small amount of avocado oil or vegetable oil.
- Bake the wings for 25 minutes on the first side. Then use tongs to flip each piece over. You should see golden, caramelized spots on the side that was facing down. Continue baking for another 5 to 10 minutes until both sides look golden brown and the skin feels tight and crispy.
- While the wings finish baking, prepare the buffalo sauce by mixing Frank’s RedHot with the melted butter in a large bowl. Stir until smooth and combined. You can adjust the ratio to make it milder (more butter) or spicier (more hot sauce) depending on your preference.
- Remove the wings from the oven and immediately transfer them to the bowl of sauce. Toss until every piece is evenly coated. Serve right away with celery sticks, carrot sticks, and blue cheese or ranch dip on the side. For extra sticky wings, place the sauced wings back under the broiler for 2 minutes, then toss in sauce one more time before serving.
Notes
- For make-ahead wings, parboil and dry the wings, then refrigerate them uncovered on a sheet pan for up to 24 hours. Bake straight from the fridge and add a few extra minutes of baking time.
- If starting with frozen wings, thaw them fully in the refrigerator overnight or in a sealed bag submerged in cold water for a few hours before parboiling.
- Wing sizes vary a lot between brands. Use the baking times as estimates and rely on visual cues — look for golden, caramelized skin on both sides.
- This recipe works with any sauce. Try BBQ, honey garlic, garlic parmesan, or Asian sesame as alternatives to buffalo.
- Use a meat thermometer to confirm the internal temperature reaches 165°F. Pull the wings at 160°F and let them rest for 5 minutes — carryover cooking will bring them to the safe temperature.
Frequently Asked Questions
Q: Can I cook chicken wings straight from frozen without thawing?
A: You can, but the results will not be nearly as good. Frozen wings release a lot of water during cooking, which creates steam and prevents the skin from crisping. For the best results, thaw them in the fridge overnight, then parboil and bake as directed. If you must cook from frozen, bake at 400°F for about 40 minutes total, flipping halfway through.
Q: Do I really need to parboil the wings first?
A: It is not strictly required, but it makes a huge difference. Parboiling removes excess fat from under the skin, which is what causes oven-baked wings to turn out greasy and soft. Wings that skip this step will still be edible, but they will not have that golden, crackly crunch that makes this method so popular.
Q: Why are my baked wings sticking to the pan?
A: This usually means the wings were not dried well enough after parboiling. Make sure to let them steam off in a colander for a few minutes, then press and squeeze each one dry with paper towels. If sticking is still an issue, lightly grease the sheet pan with avocado oil or vegetable oil. Do not use parchment paper, as it traps moisture underneath.
Q: How do I know when the wings are fully cooked?
A: The safest way is to use an instant-read meat thermometer. Insert it into the thickest part of a drumette without touching the bone. The internal temperature should reach 165°F. A good tip is to pull the wings at 160°F and let them rest for about five minutes, as carryover cooking will bring them up to the safe temperature while keeping the meat juicy.