
There’s a whole generation of home cooks who grew up watching their grandmothers do something that would make modern recipe developers scratch their heads — spoon applesauce directly onto chicken in a hot skillet, let it bubble for a few minutes, and serve it like it was the most normal thing in the world. Because in the 1970s, it was. Applesauce wasn’t just baby food or a side dish. It was a sauce, a glaze, a tenderizer, and a secret weapon sitting in every pantry in America.
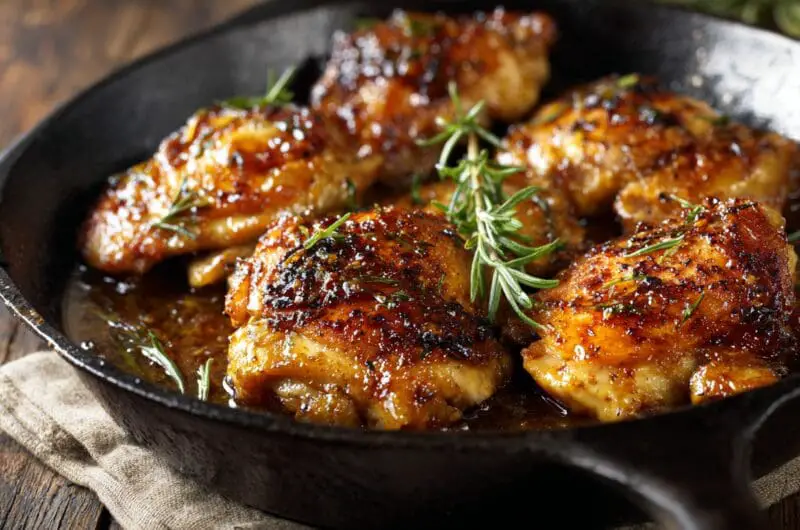
This recipe is a love letter to that era. It’s dead simple, uses maybe nine ingredients, and comes together in under 30 minutes. The chicken gets a nice sear, the onions go soft and sweet, and the applesauce melts into this tangy, slightly spiced sauce that coats everything. It doesn’t look fancy. It’s not supposed to. It’s the kind of dinner that makes a house smell like someone actually lives there and cares about feeding the people in it.
Why Applesauce on Chicken Actually Works
If you’ve never tried this combination, I get the hesitation. But think about it for a second. Pork chops and applesauce is a classic pairing that nobody questions. Chicken and fruit sauces show up in restaurants all the time — cranberry, mango, peach. Applesauce just happens to be the humble, unglamorous version that your grandmother used because it was cheap, it was always in the cupboard, and it worked.
The natural sugars in the applesauce caramelize slightly in the hot pan, giving the sauce a depth you wouldn’t expect. The pectin in the apples helps the sauce cling to the chicken instead of sliding off. And the acidity — that slight tartness — cuts through the richness of the meat the same way a squeeze of lemon would on fish. It’s not complicated food science. It’s just a good idea that worked for decades before anyone bothered to explain why.
The Ingredients You Need (and Don’t Need)
This recipe calls for 4 boneless, skinless chicken breasts or chicken thighs, one small onion sliced thin, 1 cup of applesauce, 1/2 cup of water, 1 tablespoon of minced garlic, 2 teaspoons of apple cider vinegar (white vinegar works in a pinch), 1 teaspoon of vegetable oil, 1/2 teaspoon of black pepper, a pinch of cinnamon, and optional red pepper flakes if you want a little kick.
Now, about that cinnamon — don’t skip it. I know it sounds like a dessert move, but a tiny pinch of cinnamon does something magical with the apple and the savory chicken. You won’t taste cinnamon in the finished dish. You’ll just taste something warm and a little complex that you can’t quite put your finger on. That’s the cinnamon doing its job quietly in the background.
As for the applesauce itself, store-bought is perfectly fine. Grab a jar of Mott’s unsweetened or whatever your grocery store carries. Some people swear by organic brands like Santa Cruz, which comes in flavors like cinnamon and peach mango. Those work too and add another layer. Homemade applesauce will give you a more textured, rustic result, but honestly, this recipe was built for the stuff that comes in a jar. That’s the whole point.
Chicken Breasts vs. Chicken Thighs
You can go either way here, and I have strong feelings about it. Chicken thighs are more forgiving. They stay moist even if you overcook them by a minute or two, and they have more flavor on their own. They’re also budget-friendly — often a dollar or more per pound cheaper than breasts at most grocery stores.
Chicken breasts work great too, especially if you pound them to an even thickness first. Uneven chicken breasts are the number one reason people end up with dry chicken. Take two minutes, put each breast between plastic wrap, and whack it with a rolling pin or the bottom of a heavy pan until it’s about 3/4 inch thick all the way across. You’ll cook it more evenly and shave a few minutes off your total time.
Either way, make sure your chicken hits 165°F internal temperature. Use an instant-read thermometer. They cost eight bucks at Walmart and will change how you cook meat forever.
How to Cook It on the Stovetop
Pour a little vegetable oil into a sauté pan or skillet — a cast iron skillet is ideal here, but any heavy-bottomed pan will do. Set the heat to medium-low and sauté the sliced onion and minced garlic until the onion gets soft and translucent, about 3-4 minutes. Don’t rush this step. If your garlic burns, it’ll taste bitter and there’s no coming back from that.
Once the onion and garlic are ready, add the applesauce, water, apple cider vinegar, black pepper, cinnamon, and red pepper flakes if using. Stir it all together and let it come to a gentle bubble. Now nestle your chicken pieces into the sauce. Cook on one side for about 5 minutes, then flip and cook the other side for another 5 minutes. The sauce will reduce and thicken while the chicken cooks through.
If you like a little browning on your chicken — and you should — you can sear the chicken separately in a hot pan with a bit of oil before adding it to the sauce. Season the chicken with salt and pepper, get a nice golden crust on both sides over medium-high heat, then transfer it into the simmering applesauce mixture. This adds maybe five extra minutes to your cook time, but the flavor difference is noticeable.
The Slow Cooker Version (For Busy Days)
Here’s where this recipe really earns its keep. If you have a slow cooker, you can dump everything in and walk away. Combine the applesauce, water, vinegar, garlic, cinnamon, black pepper, and sliced onion in the crockpot. Place the chicken pieces on top or nestle them into the sauce. Cook on low for 6 to 8 hours or on high for 3 to 4 hours.
The slow cooker version produces a different result than the stovetop — the chicken practically falls apart and the sauce gets silky. Some people prefer it. If you want the best of both worlds, sear the chicken in a hot pan first for that golden crust, then transfer everything to the slow cooker. A few extra minutes of effort, but you get browning and tenderness in the same dish.
One thing to know: if you’re using frozen chicken in the slow cooker, add about an hour of extra cooking time. It thaws quickly in there, but you want to make sure it cooks through completely.
Variations Worth Trying
The basic recipe is great on its own, but there are a few riffs that are worth mentioning. If you want a sweet-and-smoky version, mix 2/3 cup of applesauce with 2/3 cup of your favorite spicy barbecue sauce, 2 tablespoons of brown sugar, and 1 teaspoon of chili powder. Pour that over seared chicken and simmer covered for 7-10 minutes. That version clocks in at about 20 minutes total and has a completely different personality — bolder, sweeter, with some real backbone from the chili powder.
Another approach: skip the applesauce entirely and use fresh apple slices with apple cider. Firm apples like Granny Smith, Honeycrisp, or Pink Lady hold up well in a hot pan. Sear your seasoned chicken, remove it, then cook sliced apples and shallots in the same pan with brown sugar and a cup of apple cider until the sauce thickens. Add the chicken back in. This is a fresher, more modern take that still hits the same sweet-savory notes.
For the barbecue version, one reader reported using a splash of hot sauce along with the applesauce and BBQ sauce, and the sweet-spicy balance was a hit with the whole family. If you have Frank’s Red Hot in the fridge (and who doesn’t), try a tablespoon.
What to Serve with It
Mashed potatoes are the obvious call here, and the obvious call is right. That applesauce pan sauce pooling into a mound of buttery mashed potatoes is exactly the kind of comfort food this dish was designed for. A simple green salad with a vinaigrette works if you want something lighter on the side.
Rice is another solid option — white rice, brown rice, whatever you have. The sauce soaks into it nicely. Green beans are a classic partner too, especially if you sauté them with a little butter and garlic. Dinner rolls or even a thick slice of crusty bread will help you get every last bit of sauce off the plate, which you will want to do.
Storage and Leftovers
Leftovers keep well in an airtight container in the fridge for up to 3-4 days. The sauce will thicken up in the fridge, so add a splash of water or chicken broth when you reheat. A skillet over low heat is the best reheating method — the microwave works fine but can dry out the chicken if you’re not careful. Cover it with a damp paper towel if you go the microwave route.
This dish also freezes well. Let it cool completely, transfer to a freezer-safe container or a gallon Ziploc bag, and freeze for up to 3 months. Thaw overnight in the fridge before reheating. Don’t try to reheat it from frozen — you’ll end up with hot edges and a cold center, which is neither safe nor pleasant.
Why This Recipe Deserves a Comeback
Cooking trends come and go, but the logic behind this dish never stopped making sense. It’s cheap. It’s fast. It uses pantry staples that most American families already have. And it tastes like someone who loves you made it, which is really the whole point of a home-cooked dinner. The 1970s got a lot of things wrong — shag carpet, avocado-green appliances — but this wasn’t one of them. Make it once, and you’ll understand why grandma kept going back to that cast iron skillet.
Frequently Asked Questions
Q: Should I use sweetened or unsweetened applesauce?
A: Unsweetened is the safer choice because it lets you control the sweetness of the final dish. If all you have is sweetened, go ahead and use it — just skip any added sugar in the recipe and taste the sauce as it cooks. You can always adjust at the end.
Q: Can I use bone-in chicken pieces instead of boneless?
A: Absolutely. Bone-in, skin-on thighs or drumsticks work well, but you’ll need to increase your cooking time significantly — about 25-30 minutes in the skillet with the lid on, or 6-8 hours on low in the slow cooker. Use a thermometer to confirm 165°F at the thickest part near the bone.
Q: Can I substitute apple cider or apple juice for the applesauce?
A: They create a different dish — thinner sauce, less body. Apple cider will give a stronger apple flavor than apple juice since it’s unfiltered. If you want the thick, clinging sauce that defines this recipe, stick with applesauce. One reader on a popular recipe blog swapped cider for applesauce and said it worked, but it’s a different texture entirely.
Q: My kids don’t like onions. Can I leave them out?
A: You can, and the dish will still taste good. The onion adds sweetness and body to the sauce as it cooks down, though. If your concern is texture, try grating the onion on a box grater instead of slicing it. It’ll dissolve into the sauce completely and no one will ever know it’s there.
Grandma’s 1970s Apple Sauce Chicken Skillet
Course: DinnerCuisine: American4
servings10
minutes15
minutes310
kcalA retro one-pan chicken dinner simmered in a tangy applesauce sauce with onions, garlic, and warm cinnamon — ready in under 30 minutes.
Ingredients
4 boneless, skinless chicken breasts or chicken thighs
1 small onion, sliced thin
1 cup applesauce (unsweetened preferred)
1/2 cup water
1 tablespoon minced garlic
2 teaspoons apple cider vinegar
1 teaspoon vegetable oil
1/2 teaspoon black pepper
Pinch of cinnamon and optional pinch of red pepper flakes
Directions
- Pour the vegetable oil into a large skillet or sauté pan and set the heat to medium-low. Add the sliced onion and minced garlic to the pan. Sauté gently, stirring occasionally, until the onion is soft and translucent — about 3 to 4 minutes. Keep the heat low so the garlic doesn’t burn.
- Add the applesauce, water, apple cider vinegar, black pepper, cinnamon, and red pepper flakes (if using) to the skillet. Stir everything together until well combined. Let the mixture come to a gentle bubble, stirring once or twice so nothing sticks to the bottom.
- Season the chicken pieces on both sides with salt and pepper. Nestle the chicken into the simmering applesauce mixture, making sure each piece is partially submerged in the sauce.
- Cook the chicken on the first side for about 5 minutes without moving it. This lets the bottom develop some color and allows the sauce to start working into the meat.
- Flip the chicken pieces over carefully with tongs. Spoon some of the applesauce mixture over the tops of the chicken. Continue cooking for another 5 minutes on the second side.
- Check the internal temperature of the chicken with an instant-read thermometer. You’re looking for 165°F at the thickest part of the meat. If it’s not there yet, cover the pan and cook for another 2-3 minutes.
- Once the chicken is cooked through, spoon the thickened applesauce pan sauce generously over each piece. Let the dish rest in the pan off heat for 1-2 minutes so the flavors settle.
- Serve hot alongside mashed potatoes, rice, or a simple green salad. Spoon any remaining sauce from the skillet over the sides as well — it’s too good to leave behind.
Notes
- For a deeper flavor, sear the chicken in a separate hot pan with oil until golden on both sides before adding it to the applesauce sauce. This adds about 5 minutes but gives you a much better crust.
- This recipe works in a slow cooker: combine all ingredients except the chicken, place chicken on top, and cook on low for 6-8 hours or high for 3-4 hours. Increase liquid slightly if needed.
- Both store-bought and homemade applesauce work here. Unsweetened is recommended so you can control the sweetness, but sweetened applesauce is fine — just taste the sauce before serving and adjust.