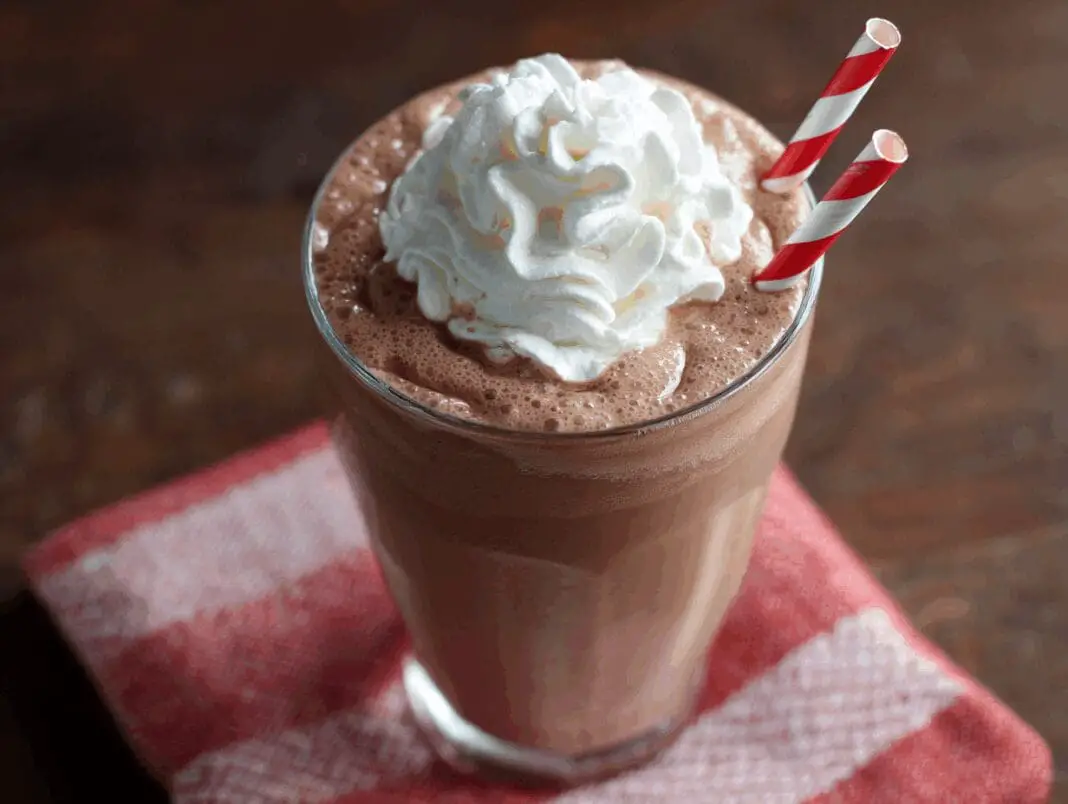
Making a perfect Wendy’s Frosty at home sounds impossible, right? Wrong! This copycat recipe uses just three ingredients that are probably sitting in your kitchen right now. While the original fast-food version requires expensive equipment and secret formulas, this homemade version delivers that same thick, creamy chocolate goodness in under 30 minutes. The best part? It actually tastes better than the drive-thru version and costs a fraction of the price.
Only three ingredients create the perfect texture
The magic behind this recipe lies in its simplicity. Chocolate milk provides the base flavor and liquid foundation, while sweetened condensed milk adds that signature thick sweetness that makes Frosties so addictive. Cool Whip might seem like an odd choice, but it’s the secret ingredient that creates that light, airy texture we all crave. These three components work together to mimic the exact consistency of the original.
Most people assume you need expensive ice cream makers or complicated techniques, but this copycat recipe proves otherwise. The sweetened condensed milk acts as a natural thickener, eliminating the need for additional stabilizers or complicated mixing processes. Cool Whip provides the creamy mouthfeel without requiring you to whip heavy cream from scratch. Even store-brand chocolate milk works perfectly, making this an incredibly budget-friendly treat that rivals any premium ice cream shop.
Two different methods work equally well
If you own an ice cream maker, simply blend all ingredients together and pour the mixture into your machine. Most ice cream makers will churn this into perfect Frosty consistency within 20-30 minutes. The churning action incorporates air while freezing, creating that signature smooth texture. Check the consistency frequently because over-churning can make it too thick to drink through a straw.
Don’t have an ice cream maker? The freeze-and-whisk method works just as well, though it requires a bit more attention. Pour your blended mixture into an airtight container and freeze it, whisking vigorously every 20 minutes for about two hours. This manual method breaks up ice crystals as they form, preventing that dreaded icy texture. Some people even use mason jars, shaking them every 20 minutes instead of whisking, which works surprisingly well for single servings.
Temperature makes all the difference
Starting with cold ingredients speeds up the freezing process and creates a smoother final product. Put your chocolate milk in the freezer for 20-30 minutes before mixing, but don’t let it actually freeze solid. The sweetened condensed milk should be chilled too, though it doesn’t need as much pre-cooling since it’s already thick. Room temperature ingredients will work, but they’ll take longer to reach that perfect Frosty consistency.
Cool Whip should be slightly thawed for easier blending, but still cold to the touch. If it’s too frozen, it won’t incorporate smoothly and might leave lumps in your final product. If it’s too warm, it loses that fluffy texture that makes the Frosty so special. The ideal temperature is when you can easily scoop it but it still holds its shape when dropped from a spoon.
Metal bowls freeze faster than plastic
If you’re using the freeze-and-whisk method, your container choice matters more than you might think. Metal bowls conduct cold more efficiently than plastic or glass, helping your mixture freeze faster and more evenly. Stainless steel mixing bowls work perfectly and are easy to whisk in without scratching. The faster freezing time means less opportunity for large ice crystals to form, resulting in a smoother texture.
Wide, shallow containers work better than tall, narrow ones because they expose more surface area to the cold air. This helps the mixture freeze more quickly and makes whisking easier. Some people swear by using multiple smaller containers instead of one large one, claiming it creates more consistent results. Whatever container you choose, make sure it has a tight-fitting lid to prevent freezer burn and absorbing other freezer odors.
Regular milk works with simple adjustments
No chocolate milk on hand? Regular milk works perfectly with a few spoonfuls of cocoa powder or chocolate syrup mixed in. Nesquik powder is ideal because it dissolves easily and provides that familiar chocolate milk taste. Start with about three tablespoons per cup of milk and adjust to your preference. Hershey’s syrup works too, though you might need to blend it longer to ensure even distribution.
Whole milk creates the richest results, but 2% milk works fine too. Skim milk tends to create a slightly icier texture, though it’s still perfectly enjoyable. Some people prefer using chocolate protein shakes instead of regular chocolate milk for a thicker, more indulgent base. The protein powder acts as an additional thickener, creating an even more decadent final product that’s closer to soft-serve ice cream than a traditional Frosty.
Whisking technique prevents ice crystals
When using the manual freeze method, your whisking technique directly impacts the final texture. Vigorous whisking every 20 minutes is crucial for breaking up ice crystals as they form. Use a regular wire whisk or even a fork, scraping the sides and bottom of the container thoroughly. The goal is to keep everything moving and prevent large ice chunks from developing.
Some people use hand mixers for this step, which works well but requires careful timing to avoid over-mixing. The mixture should look smooth and creamy after each whisking session, gradually thickening with each round. If you notice any icy chunks forming, whisk them out immediately. This process typically takes 1-2 hours total, depending on your freezer temperature and the initial temperature of your ingredients.
Storage keeps it fresh for weeks
Homemade Frosties store beautifully in airtight containers for up to a month in the freezer. Unlike store-bought ice cream, this recipe doesn’t contain preservatives, so it will freeze harder than the original soft-serve consistency. This isn’t a problem – just let it sit at room temperature for 10-15 minutes before scooping. The texture returns to that perfect Frosty consistency once it softens slightly.
For best results, store in shallow containers rather than deep ones. This makes it easier to scoop and allows for more even thawing. Some people portion it into individual serving containers, which makes grabbing a quick treat even more convenient. Mason jars work perfectly for single servings and stack nicely in the freezer. Just remember to leave some headspace since the mixture expands slightly when frozen solid.
Strawberry milk creates amazing variations
Once you’ve mastered the basic chocolate version, experimenting with different milk varieties opens up endless possibilities. Strawberry milk creates a pink Frosty that tastes like liquid strawberry ice cream. The same measurements work perfectly – just swap the chocolate milk for strawberry and follow the exact same process. Kids absolutely love this variation, and it’s perfect for birthday parties or special occasions.
Vanilla milk works too, though it’s harder to find in stores. You can make your own by adding vanilla extract and a touch of sugar to regular milk. Coffee milk creates an amazing mocha-flavored treat that adults particularly enjoy. Even flavored protein shakes work as substitutes, creating thicker, more nutritious versions. The possibilities are endless once you understand the basic ratios and techniques involved.
Perfect consistency matters for dipping fries
Getting that perfect Frosty consistency isn’t just about taste – it’s about functionality too. The mixture should be thick enough to coat a spoon but thin enough to drink through a wide straw. Most importantly, it needs to be the right consistency for dipping french fries, which is half the fun of getting a Wendy’s Frosty in the first place. The sweet and salty combination is absolutely addictive.
If your homemade version turns out too thick, let it sit at room temperature for a few minutes or add a splash of cold milk. If it’s too thin, pop it back in the freezer for 10-15 minutes. The perfect consistency should hold its shape when scooped but melt smoothly on your tongue. It should be thick enough that fries stand up in it momentarily but not so thick that it’s difficult to mix or drink.
This incredibly simple recipe proves that some of the best treats don’t require complicated techniques or expensive equipment. With just three basic ingredients and a little patience, anyone can create that signature Wendy’s Frosty experience at home. Whether you use an ice cream maker or the manual freeze method, the results are consistently delicious and surprisingly authentic.
Three Ingredient Copycat Wendy’s Frosty
Course: DessertCuisine: American8
servings5
minutes20
minutes241
kcalThis ridiculously easy copycat Wendy’s Frosty recipe uses just three ingredients to create the perfect thick, creamy chocolate treat at home.
Ingredients
4 cups chocolate milk (very cold)
3/4 cup sweetened condensed milk (about half a can)
4 oz frozen Cool Whip (about half the container)
Directions
- Add all ingredients to a blender and blend until completely smooth. Make sure the chocolate milk is very cold before starting, as this helps achieve the best texture. Blend for about 30-60 seconds until everything is well combined and there are no lumps from the Cool Whip.
- For ice cream maker method: Pour the blended mixture into your prepared ice cream maker and follow the manufacturer’s instructions. Check the consistency frequently, as it typically reaches perfect Frosty texture in about 20 minutes. Stop churning once it reaches that thick but sippable consistency.
- For freeze-and-whisk method: Pour the mixture into an airtight container, preferably metal, and place in the freezer. Set a timer for 20 minutes and whisk vigorously when it goes off, scraping sides and bottom thoroughly. The mixture should be getting slightly thicker with each whisking session.
- Continue the freeze-and-whisk process for 1-2 hours total, whisking every 20 minutes. The mixture is ready when it holds its shape when scooped but is still soft enough to drink through a wide straw. If using an ice cream maker, serve immediately for best texture.
- If the mixture becomes too hard after freezing, let it sit at room temperature for 10-15 minutes before serving. This will soften it back to that perfect Frosty consistency. Scoop into glasses or bowls and serve immediately with spoons or wide straws.
Notes
- For best results, chill chocolate milk in freezer for 20-30 minutes before starting
- Cool Whip should be slightly thawed but still cold for easier blending
- No chocolate milk? Mix regular milk with 3 tablespoons cocoa powder and 2 tablespoons sugar
- Stores in freezer for up to 1 month in airtight containers
- Try strawberry milk for a fun pink variation that kids love
Frequently asked questions
Q: Can I make this without an ice cream maker?
A: Absolutely! The freeze-and-whisk method works perfectly. Just whisk the mixture every 20 minutes for 1-2 hours until it reaches the right consistency. It takes more effort but produces equally delicious results.
Q: Why is my Frosty too thick or too runny?
A: If it’s too thick, let it sit at room temperature for 10-15 minutes. If it’s too runny, freeze it longer or try using colder ingredients next time. The perfect consistency should coat a spoon but still be drinkable.
Q: Can I substitute the Cool Whip with something else?
A: Yes, you can use homemade whipped cream made with heavy cream and powdered sugar. However, Cool Whip provides the most authentic texture that matches the original Wendy’s Frosty.
Q: How long does homemade Frosty last in the freezer?
A: It stays good for up to one month in an airtight container. Since it doesn’t contain preservatives, it will freeze harder than the original, so let it thaw for 10-15 minutes before serving.


