
Get ready to transport back in time with this incredible old-fashioned chocolate layer cake recipe that will take your baking skills to new heights. This classic dessert combines the perfect blend of nostalgic flavors and modern techniques to create a cake that is both delightful to look at and even more delicious to eat. With its moist, tender crumb and rich, decadent frosting, this cake is sure to become a family favorite for generations to come.
The Secret to Perfecting This Old-Fashioned Cake
The key to achieving the perfect old-fashioned chocolate layer cake cake lies in the quality of the ingredients and the precision of the baking process. Start by gathering all the necessary baking ingredients, including flour, sugar, butter, eggs, and vanilla extract. Make sure to use high-quality, fresh ingredients for the best results.
Next, focus on creating a light and fluffy cake batter by carefully measuring your ingredients and following the recipe instructions to the letter. Use a kitchen scale for precise measurements and a stand mixer to ensure thorough mixing without overmixing, which can lead to a tough, dense cake.
When it comes to baking, pay close attention to the temperature and baking time. Use an oven thermometer to ensure your oven is accurately calibrated and adjust the baking time as needed to achieve a perfectly baked cake that is golden brown and springs back when gently touched.
Tip: For even baking and easy removal, use high-quality cake pans lined with parchment paper.
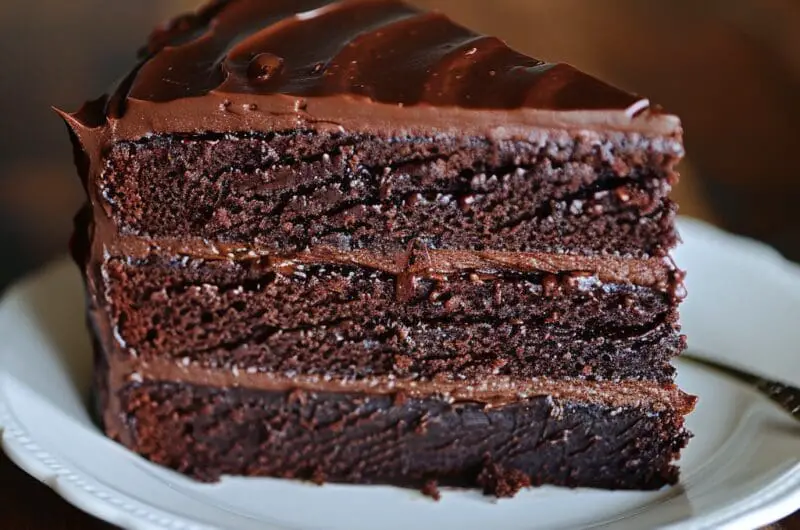
Once your cake layers are baked and cooled, it’s time to focus on the star of the show: the old-fashioned frosting. This rich, creamy frosting is made with a combination of butter, sugar, cocoa powder, and evaporated milk, cooked to perfection to create a smooth, glossy finish that pairs perfectly with the tender cake layers.
To assemble your cake, carefully stack the layers with a generous amount of frosting between each one. Use an offset spatula to ensure even distribution of the frosting and to create a smooth, polished look on the exterior of the cake.
Elevating Your Old-Fashioned Cake with Creative Touches
While the classic recipe is undeniably delicious on its own, there are plenty of ways to elevate your old-fashioned cake and make it truly stand out. Consider adding a splash of your favorite liqueur, such as bourbon or amaretto, to the cake batter or frosting for an extra depth of flavor.
For a stunning visual effect, try incorporating different frosting colors or techniques, such as ombré or marbled designs. Use high-quality food coloring gels to achieve vibrant, long-lasting colors that will make your cake a true work of art.
Another way to take your old-fashioned cake to the next level is by adding unique garnishes or toppings. Consider topping your cake with candied fruits, edible flowers, or even a drizzle of caramel or chocolate sauce for an extra touch of indulgence.
Tip: Experiment with different flavor combinations, such as adding a layer of fruit preserves or a sprinkle of toasted nuts, to create a truly one-of-a-kind old-fashioned cake.
When it comes to serving your old-fashioned cake, presentation is key. Invest in a beautiful cake stand or serving platter to showcase your masterpiece, and don’t forget to pair it with the perfect accompaniments, such as a scoop of vanilla ice cream or a steaming cup of coffee or tea.
Sharing the Joy of Old-Fashioned Cake with Your Loved Ones
One of the greatest joys of baking is sharing the fruits of your labor with the people you love. This old-fashioned cake is the perfect dessert to bring to family gatherings, potlucks, or even as a thoughtful gift for a friend or neighbor.
As you slice into your masterpiece and watch the looks of delight on your loved ones’ faces, you’ll know that all the time and effort you put into creating this incredible old-fashioned cake was well worth it. Not only will you have a delicious dessert to enjoy, but you’ll also be creating cherished memories and family traditions that will last a lifetime.
So go ahead and indulge in a slice (or two) of this amazing old-fashioned cake, and savor the flavors and memories that come with it. With its irresistible combination of nostalgia and modern baking techniques, this cake is sure to become a beloved family favorite that will be passed down for generations to come.
This old-fashioned cake recipe is a true testament to the power of classic flavors and time-honored baking techniques. By following the tips and tricks outlined in this article, you’ll be well on your way to creating a cake that is not only delicious but also a true work of art. So, gather your ingredients, preheat your oven, and get ready to embark on a baking adventure that will take your skills to the next level and delight your loved ones with every bite.
Old-Fashioned Chocolate Layer Cake
Course: DessertCuisine: American12
servings30
minutes35
minutes450
kcalTransport your taste buds back in time with this incredible old-fashioned chocolate layer cake that will elevate your baking game and impress your guests.
Ingredients
2 cups all-purpose flour
2 cups granulated sugar
3/4 cup unsweetened cocoa powder
2 teaspoons baking powder
1 1/2 teaspoons baking soda
1 teaspoon salt
2 eggs
1 cup milk
1/2 cup vegetable oil
Directions
- Preheat your oven to 350°F (175°C). Grease and flour two 9-inch round cake pans, tapping out any excess flour. For extra insurance against sticking, you can line the bottoms of the pans with parchment paper rounds.
- In a large mixing bowl, combine the flour, sugar, cocoa powder, baking powder, baking soda, and salt. Whisk the dry ingredients together until they are well combined and no lumps remain. This step helps ensure that the leavening agents and cocoa powder are evenly distributed throughout the batter.
- In a separate bowl, whisk together the eggs, milk, vegetable oil, and vanilla extract until they are well combined. Pour the wet ingredients into the bowl with the dry ingredients and mix until just combined. Be careful not to overmix the batter, as this can lead to a tough, dense cake.
- Divide the batter evenly between the prepared cake pans. Use a spatula to smooth the tops of the batter and ensure that it is evenly distributed in the pans. Give the pans a gentle tap on the counter to release any air bubbles that may have formed in the batter.
- Bake the cakes for 30-35 minutes, or until a toothpick inserted into the center comes out clean. The cakes should be risen and slightly pulling away from the sides of the pans. Allow the cakes to cool in the pans for 10 minutes before turning them out onto a wire rack to cool completely.
- While the cakes are cooling, prepare the old-fashioned chocolate frosting. In a medium saucepan, combine the butter, sugar, cocoa powder, and evaporated milk. Cook the mixture over medium heat, stirring constantly, until it comes to a boil. Let the frosting boil for 1 minute, then remove it from the heat and stir in the vanilla extract.
- Allow the frosting to cool slightly, stirring occasionally, until it has thickened enough to spread. If the frosting becomes too thick, you can thin it out with a little more evaporated milk. If it is too thin, let it cool for a few more minutes until it reaches the desired consistency.
- To assemble the cake, place one of the cooled cake layers on a serving plate or cake stand. Spread a generous amount of the chocolate frosting over the top of the cake layer, using an offset spatula to ensure even coverage. Place the second cake layer on top of the frosting and press down gently to secure it in place. Spread the remaining frosting over the top and sides of the cake, using the spatula to create a smooth, even finish. Slice and serve the cake, savoring every bite of this classic, old-fashioned dessert.
Notes
- For a more intense chocolate flavor, you can use a combination of natural and Dutch-processed cocoa powder in the cake batter.
- If you prefer a thinner frosting, you can add a little more evaporated milk to the frosting mixture until it reaches your desired consistency.
- For a decorative touch, you can garnish the top of the cake with chocolate shavings, cocoa powder, or fresh berries.
Frequently Asked Questions
Q: Can I make this cake ahead of time?
A: Yes, you can bake the cake layers a day in advance and store them, tightly wrapped in plastic wrap, at room temperature. You can also prepare the frosting ahead of time and store it in the refrigerator. Just be sure to let the frosting come to room temperature and give it a good stir before using it to frost the cake.
Q: Can I substitute the vegetable oil with butter?
A: While you can use melted butter in place of the vegetable oil, keep in mind that this will result in a slightly denser cake with a more pronounced buttery flavor. Vegetable oil helps keep the cake moist and tender, so it’s the preferred choice for this recipe.
Q: How should I store any leftover cake?
A: Store any leftover cake in an airtight container at room temperature for up to 3 days. If your kitchen is particularly warm or humid, you can store the cake in the refrigerator to help preserve its freshness, but be sure to let it come to room temperature before serving for the best texture and flavor.
Q: Can I make this cake in a different size or shape?
A: Yes, you can bake this cake in a 9×13-inch rectangular pan or even as cupcakes. Just keep in mind that the baking time will vary depending on the size and shape of your pan, so keep a close eye on the cake and test it with a toothpick for doneness.