
Gravy is the unsung hero of many a meal, transforming ordinary dishes into extraordinary feasts. Whether you’re preparing a holiday dinner or a simple weeknight supper, mastering the art of gravy-making is a skill that will elevate your culinary game. This 5-minute gravy recipe is so simple and delicious, you’ll want to commit it to memory. Say goodbye to lumpy, flavorless store-bought gravy and hello to a silky-smooth, homemade version that will have your family and friends begging for seconds.
The Magic of Homemade Gravy
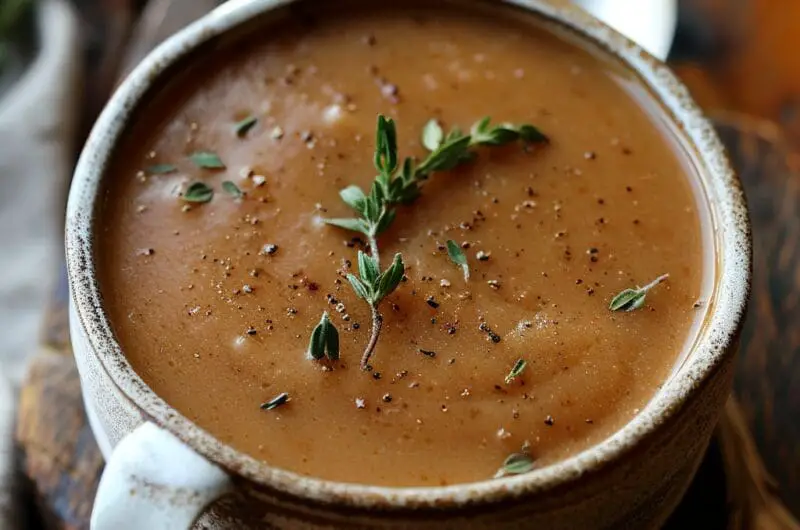
There’s something truly magical about homemade gravy. It’s the perfect finishing touch that can turn a simple plate of mashed potatoes into a comforting masterpiece. The best part? You don’t need to be a culinary wizard to create this liquid gold. With just a few basic ingredients and a little know-how, you can whip up a batch of gravy that will rival any five-star restaurant.
The key to perfect gravy lies in the roux – a mixture of fat and flour that forms the base of your sauce. By mastering this simple technique, you’ll be able to create gravy that’s smooth, rich, and full of flavor. And once you’ve got the basics down, you can easily customize your gravy to complement any meal, from roast turkey to beef stew.
One of the best things about this recipe is its versatility. You can use pan drippings from your roasted meats for extra flavor, or stick with store-bought broth for a quick and easy version. Either way, you’ll end up with a gravy that’s leagues ahead of anything that comes from a packet or jar.
Tip: For the best results, use a flat whisk when making your roux. It helps prevent lumps and ensures a smooth gravy every time.
Now, let’s dive into the nitty-gritty of gravy making. The basic ratio to remember is 1.5 tablespoons each of fat and flour for every cup of liquid. This will yield about one cup of gravy, which is perfect for a small family dinner. Of course, you can easily scale this up for larger gatherings or if you’re a gravy enthusiast (no judgment here!).
Start by melting your fat of choice – butter works wonderfully, but you can also use the drippings from your roasted meat for extra flavor. Once it’s melted and bubbling, whisk in an equal amount of all-purpose flour. Keep whisking for a minute or two until the mixture turns golden and smells nutty. This is your roux, and it’s the foundation of a great gravy.
The Secret to Smooth, Lump-Free Gravy
Now comes the crucial part – adding the liquid. This is where many home cooks go wrong, ending up with a lumpy mess instead of silky-smooth gravy. The secret? Add your liquid gradually, whisking constantly as you pour. This allows the roux to incorporate smoothly into the liquid, preventing those dreaded lumps.
For the liquid, you have several options. If you’re using pan drippings, you’ll want to skim off the excess fat first. A gravy fat separator is a handy tool for this job, but you can also use a spoon to skim off the fat that rises to the top. If you don’t have drippings, don’t worry! You can use chicken, beef, or vegetable broth depending on what you’re serving the gravy with.
Once all the liquid is added, bring your gravy to a simmer and let it cook for a few minutes. This allows the flour to fully cook out and the gravy to thicken to the perfect consistency. Remember, your gravy will continue to thicken as it cools, so it’s better to err on the side of slightly too thin rather than too thick.
Tip: If your gravy ends up too thick, simply whisk in a little more broth or even water to thin it out. If it’s too thin, let it simmer for a few more minutes to reduce and thicken.
Now comes the fun part – seasoning your gravy. At the very least, you’ll want to add salt and freshly ground black pepper to taste. But don’t be afraid to get creative! A dash of Worcestershire sauce can add depth to beef gravy, while a pinch of poultry seasoning works wonders in turkey or chicken gravy. For an extra punch of umami, try adding a teaspoon of mushroom powder or a splash of soy sauce.
Elevating Your Gravy Game
Once you’ve mastered the basic gravy recipe, you can start experimenting with different variations. For a richer, more luxurious gravy, try stirring in a splash of heavy cream or a pat of butter just before serving. This adds a silky texture and a beautiful sheen to your gravy.
If you’re feeling adventurous, you can also add sautéed mushrooms, caramelized onions, or even crumbled bacon to your gravy for extra flavor and texture. Just remember to keep the additions finely chopped so they don’t overpower the smooth texture of the gravy.
For those following a gluten-free diet, you can easily adapt this recipe by using cornstarch instead of flour. Simply mix 1 tablespoon of cornstarch with 1 tablespoon of cold water for every cup of liquid, and whisk this slurry into your simmering broth. It will thicken up quickly, so keep a close eye on it!
Tip: Make a double batch of gravy and freeze the leftovers for up to 3 months. It’s a great time-saver for busy weeknights!
Remember, practice makes perfect when it comes to gravy-making. Don’t be discouraged if your first attempt isn’t picture-perfect. With each batch, you’ll gain more confidence and develop a feel for the perfect consistency and seasoning.
And here’s a pro tip: invest in a good quality gravy boat. Not only will it keep your gravy warm at the table, but it also adds a touch of elegance to your presentation. Plus, there’s something undeniably satisfying about pouring gravy from a proper gravy boat!
So there you have it – everything you need to know to become a gravy master. With this simple, foolproof recipe in your culinary arsenal, you’ll never have to suffer through bland, lumpy gravy again. Whether you’re dressing up a weeknight dinner or preparing for a holiday feast, this 5-minute gravy recipe is sure to become a staple in your kitchen. Happy gravy making!
5-Minute Homemade Gravy
Course: SauceCuisine: American4
servings30
minutes40
minutes300
kcalMaster the art of silky-smooth gravy with this quick and easy recipe that will elevate any meal from ordinary to extraordinary.
Ingredients
2 tablespoons unsalted butter
2 tablespoons all-purpose flour
1 cup chicken or beef broth, hot
1/4 teaspoon onion powder
1/4 teaspoon garlic powder
1/4 teaspoon dried thyme
1/4 teaspoon dried sage
Salt and freshly ground black pepper to taste
1 teaspoon Worcestershire sauce (optional)
Directions
- In a medium saucepan, melt the butter over medium heat. Once melted, add the flour and whisk constantly for about 1 minute to create a roux. This step is crucial for cooking out the raw flour taste and creating a smooth base for your gravy.
- Slowly pour in the hot broth while whisking continuously. This gradual addition helps prevent lumps from forming. Keep whisking until all the broth is incorporated and the mixture is smooth.
- Add the onion powder, garlic powder, thyme, and sage to the gravy. If using, add the Worcestershire sauce as well. These seasonings will give your gravy a rich, complex flavor that complements a variety of dishes.
- Continue to cook the gravy, whisking frequently, for about 2-3 minutes or until it reaches your desired consistency. Remember that the gravy will continue to thicken as it cools, so it’s better to err on the side of slightly thinner.
- Taste the gravy and adjust the seasoning with salt and freshly ground black pepper as needed. The amount of salt you need will depend on the saltiness of your broth, so always taste before adding more.
- Remove the gravy from heat and serve immediately. If not serving right away, transfer to a gravy boat or heat-safe container and cover to keep warm until ready to use.
Notes
- For a richer gravy, use a combination of chicken and beef broth.
- If you prefer a darker gravy, cook the roux for a bit longer until it turns a golden brown color before adding the broth.
- For a gluten-free version, substitute the all-purpose flour with cornstarch. Mix 1 tablespoon of cornstarch with 1 tablespoon of cold water to create a slurry, then whisk this into the hot broth.
Frequently Asked Questions
Q: Can I make this gravy ahead of time?
A: Absolutely! You can make this gravy up to 3 days in advance. Store it in an airtight container in the refrigerator. When ready to use, reheat it gently on the stovetop, whisking occasionally and adding a splash of broth if needed to thin it out.
Q: How can I fix lumpy gravy?
A: If you end up with lumps in your gravy, don’t worry! Simply strain the gravy through a fine-mesh sieve to remove any lumps. Alternatively, you can blend the gravy using an immersion blender or regular blender until smooth.
Q: Can I freeze leftover gravy?
A: Yes, you can freeze gravy for up to 3 months. Let it cool completely, then transfer to a freezer-safe container or ziplock bag. Thaw overnight in the refrigerator and reheat gently on the stovetop, whisking to recombine as it warms.
Q: How can I make this gravy vegetarian or vegan?
A: To make this gravy vegetarian, simply use vegetable broth instead of chicken or beef broth. For a vegan version, replace the butter with vegan butter or olive oil. You may need to adjust the seasonings slightly to compensate for the flavor differences.