
I eat canned beans probably four nights a week. That’s not an exaggeration — it might even be conservative. They’re cheap, they’re fast, they sit in my pantry for months without complaint, and they turn almost nothing into almost something. But for years, I was doing the bare minimum with them: dump, heat, eat. Sometimes not even the heating part.
Then I started braising them, and everything changed. Not braising like your grandmother’s pot roast — I’m talking about a lazy, 10-to-15-minute skillet situation that turns a $1.29 can of beans into something you’d actually be proud to eat for dinner. It’s become my default weeknight meal, and I want you to try it.
Why Braising Beats Just Heating Them Up
Most people treat canned beans like they’re already done. And technically, they are — canned beans are fully cooked and safe to eat straight from the can. But “safe to eat” and “good to eat” are very different things. When you just dump beans in a pot and warm them through, you get warm beans. That’s it. No depth, no richness, no reason to be excited about dinner.
Braising is the process of gently cooking food in a shallow bath of seasoned liquid. It’s not boiling — the beans aren’t swimming. They’re sitting in just enough broth to absorb flavor and develop a silky, slightly thickened sauce around them. Think of it as giving your beans a warm bath instead of a cold shower. The liquid reduces as it simmers, concentrating whatever flavors you’ve put in there, and the beans soak it all up. You end up with something brothy but not soupy, rich but not heavy. The kind of thing you want to mop up with bread.
The Basic Method (And Why It’s So Forgiving)
Here’s what I love about this approach: it’s a framework, not a rigid recipe. You start with aromatics in oil, add whatever vegetables or protein you have around, toss in the beans with some broth, and let it all simmer together. That’s it. The whole thing takes about 15 minutes, and most of that is hands-off simmering.
Start by heating a couple tablespoons of olive oil in a skillet — cast iron works great, but any pan with reasonably high sides will do. Add your aromatics. At a minimum, that’s a few cloves of garlic, minced or sliced thin. If you have an onion, dice half of it and throw that in too. A pinch of red pepper flakes. Maybe some cumin or smoked paprika if you’re feeling it. Cook all that for a minute or two until it smells amazing.
Next, if you have any raw vegetables — chopped zucchini, diced bell pepper, cherry tomatoes — add them now and let them get a little color. Chop everything into small-ish pieces so nothing takes forever to cook through. If you’re adding greens like spinach or kale, hold off — those go in at the very end since they wilt in about 30 seconds.
Now add your beans. One or two cans, depending on how hungry you are and how many people you’re feeding. Then pour in enough broth to almost cover the beans — they shouldn’t be drowning. About half a cup to three-quarters of a cup per can is usually right. You can always add more if the pan gets dry, but you can’t take it back if you’ve added too much.
Let everything simmer over medium-low heat until the vegetables are tender and the liquid has reduced into something that looks like a light sauce. That’s usually 8 to 10 minutes. Finish with a squeeze of lemon or lime, a drizzle of good olive oil, and salt to taste.
The Great Rinse Debate: Should You Drain the Can?
People have strong opinions about this, and honestly, both sides have a point. That liquid in the can? It’s starchy and salty. Some experts argue that the canning liquid is basically the same thing as the prized bean broth you get when you cook dried beans from scratch — just starchy water with a little salt. The best canned beans are simply pressure-cooked right in the can with salt and water. Pouring that down the drain means losing flavor and body.
On the other hand, that liquid can taste a little flat or tinny depending on the brand, and it’s definitely salty. Research has shown that draining and rinsing canned beans reduces sodium by an average of 41%. That’s significant if you’re watching your salt intake.
For braised beans specifically, here’s my take: drain the beans but don’t rinse them. You keep a little bit of that starch on the surface, which helps thicken your braising liquid as it simmers, but you’re controlling the salt and flavor by using your own broth. If you’re making soup or chili where everything cooks together for a while, go ahead and dump the whole can in, liquid and all. But for a quick braise where you want clean, layered flavors, draining gives you more control.
The Best Beans to Use
Any canned bean works here, but some are better suited to braising than others. White beans — cannellini, great northern, or navy — are my favorite because they’re creamy and mild, and they absorb whatever flavors you throw at them. Chickpeas hold their shape well and add a nice chew. Black beans work if you lean into Southwestern flavors with cumin, lime, and cilantro. Pinto beans are great too, especially if you let them simmer a little longer so they start to break down and thicken the sauce.
Buy whatever’s on sale, honestly. If you can find no-salt-added varieties, grab those — they give you more control over seasoning. One more thing: try to buy BPA-free cans when you can. Most major brands have switched over, but it’s worth a glance at the label.
Flavor Combinations That Actually Work
This is where braised beans really shine — they’re a blank canvas. Here are four combos I come back to constantly:
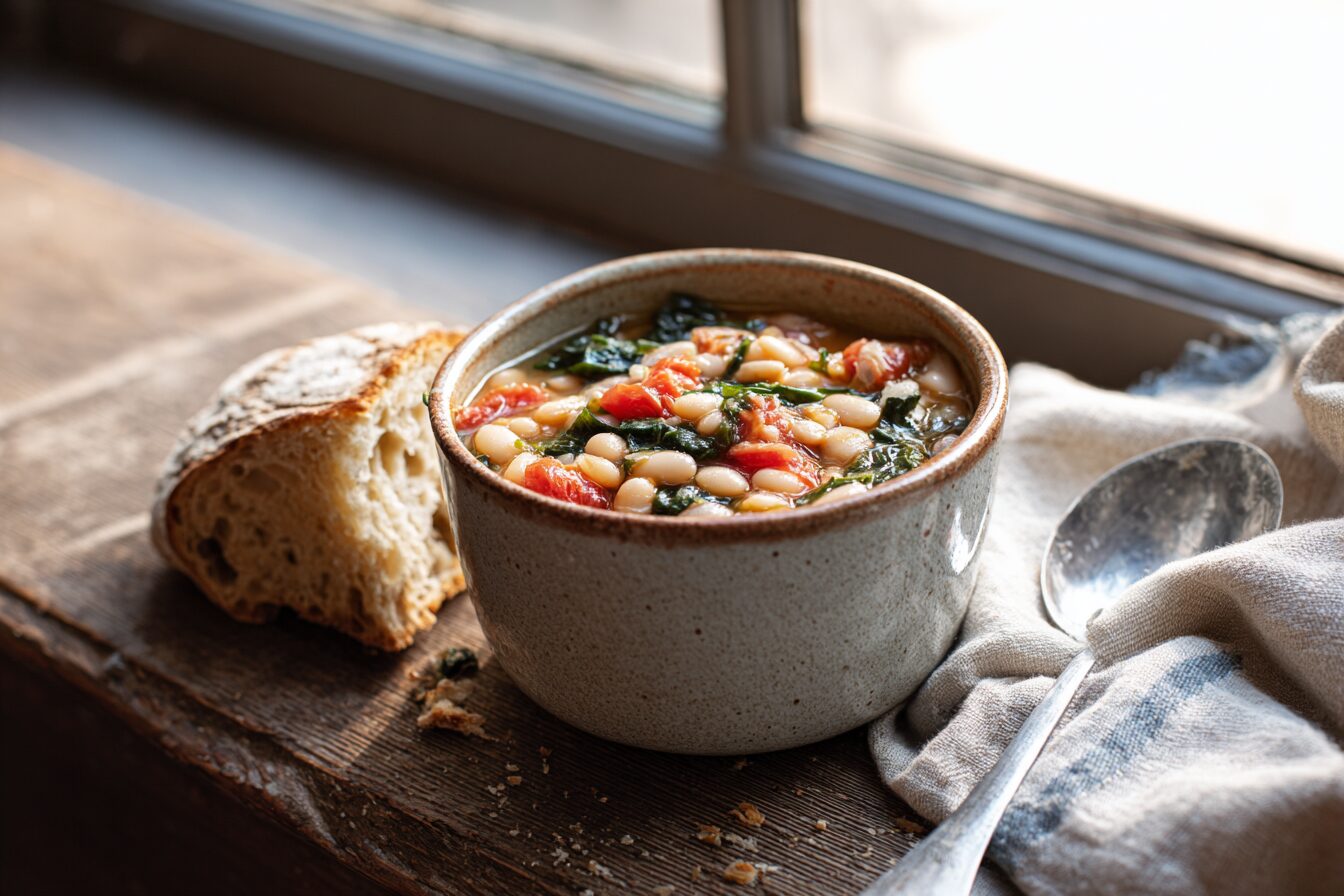
Italian-ish: White beans, garlic, crushed tomatoes, a handful of torn kale, and a Parmesan rind thrown into the braise. Finish with lemon juice and black pepper. Serve with crusty bread.
Southwestern: Black beans, onion, garlic, cumin, smoked paprika, and a diced jalapeño. Use the classic trifecta of onions, tomatoes, and garlic for the base. Finish with lime juice and cilantro. Good with rice, tortilla chips, or inside a burrito.
Smoky and simple: Pinto beans with a teaspoon of chili powder, half a teaspoon of cumin, and — this sounds weird but trust me — a small pinch of cinnamon. It adds a warm sweetness that makes everything taste more complex. Top with diced red onion and a squeeze of lime.
Quick sofrito: Take a clue from Latin American cooking. Mince a clove of garlic and a few sprigs of cilantro (stems and all) with a big pinch of kosher salt, working it into almost a paste-like consistency. Sauté that in olive oil over low heat for a minute or two until fragrant, then add your beans and a splash of broth. Done in under 10 minutes, and it tastes like someone who actually knows how to cook made it.
Common Mistakes to Avoid
The biggest mistake is adding too much liquid. You want braised beans, not bean soup. Start with less than you think you need — you can always splash in more broth. Braised beans should be brothy but not swimming. Think of a stew consistency where there’s just enough sauce to coat everything and pool slightly in the bottom of the bowl.
Second mistake: high heat. Keep the simmer gentle. You’re not trying to boil the beans — you’re coaxing flavor into them. A hard boil will make the beans mushy and blow out their skins, and your liquid will evaporate before the flavors have time to meld.
Third mistake: forgetting the acid at the end. A squeeze of lemon or lime juice right before serving wakes everything up. Without it, braised beans can taste flat no matter how well you’ve seasoned them. This is the single biggest difference between beans that taste fine and beans that taste great.
How to Serve Them
My favorite way: in a wide, shallow bowl with a big hunk of bread for sopping up the juices. That’s a complete dinner in my house and I’m not ashamed of it. But braised beans are also great spooned over pasta, rice, or any grain you have cooked. They’re excellent alongside a fried egg for breakfast. You can stuff them into a baked potato or sweet potato. You can toss them with greens for a warm salad. The brothy sauce is really the star — it turns whatever you pair it with into something that feels like a real, thought-out meal instead of something you scraped together at 8 PM.
This is the kind of cooking I actually do most nights — not ambitious, not Instagram-worthy, just fast and genuinely good. A couple cans of beans, whatever’s in the fridge, 15 minutes, dinner. Once you get comfortable with the basic method, you won’t need a recipe. You’ll just know. And that’s really the best place to be with any food.
Frequently Asked Questions
Q: Can I use dried beans instead of canned for this recipe?
A: You can, but you’d need to cook the dried beans first, which takes at least an hour (or longer without a pressure cooker). The whole point of this method is speed. Canned beans are already fully cooked, so the braise is really just about heating them through and building flavor. If you want to use dried beans, cook them ahead of time and store them in the fridge, then use them the same way you’d use canned.
Q: What kind of broth should I use?
A: Chicken broth and vegetable broth both work well. Low-sodium is better because it lets you control the salt. In a pinch, plain water with a pinch of salt and a drizzle of olive oil will do — just make sure you’ve got enough aromatics and spices in the pan to compensate for the milder liquid.
Q: Can I make a big batch and reheat leftovers?
A: Absolutely. Braised beans actually get better the next day as the flavors continue to meld. Store them in the fridge for up to four days. When you reheat, add a splash of broth or water because the beans will have absorbed most of the liquid. Reheat gently on the stove over low heat.
Q: Is there any reason to save the canned bean liquid?
A: If you’re using canned chickpeas, the liquid is called aquafaba, and it can actually be whipped like egg whites — people use it for vegan meringues and mousses. For other beans, the liquid is useful as a thickener in soups and stews. But for this braised bean method, you’re better off draining it and using your own broth for a cleaner flavor.
Quick Skillet Braised Beans
Course: DinnerCuisine: American3
servings5
minutes12
minutes250
kcalThe lazy weeknight dinner that tastes like you spent way more than 15 minutes on it.
Ingredients
2 tablespoons olive oil
½ medium yellow onion, diced
3 cloves garlic, thinly sliced
¼ teaspoon red pepper flakes
½ teaspoon smoked paprika
2 (15-ounce) cans white beans, drained
¾ cup low-sodium chicken or vegetable broth
2 big handfuls fresh spinach or kale (about 2 cups)
Juice of ½ lemon, plus kosher salt and black pepper to taste
Directions
- Heat the olive oil in a large skillet (cast iron or a sauté pan with high sides) over medium heat. Add the diced onion and a pinch of salt. Cook, stirring occasionally, until the onion is soft and translucent, about 3 minutes.
- Add the sliced garlic, red pepper flakes, and smoked paprika to the pan. Stir everything together and cook for about 30 to 60 seconds, just until the garlic is fragrant and the spices have bloomed in the oil. Don’t let the garlic brown.
- Add the drained beans to the skillet and stir to coat them in the oil and aromatics. Let the beans cook for about 1 minute, stirring once, so they start to pick up a little flavor from the pan.
- Pour in the broth. The liquid should come about halfway up the beans — they should not be submerged. If it looks like too little, add a splash more. Stir gently and bring to a low simmer.
- Let the beans simmer gently over medium-low heat for 6 to 8 minutes, stirring once or twice. The broth will reduce and thicken slightly from the starch on the beans. You want it brothy but not soupy — enough sauce to pool in the bottom of a bowl.
- Add the spinach or kale to the pan and stir it into the beans. Let it wilt for about 1 minute for spinach or 2 minutes for kale. If using kale, you can add it a minute or two earlier so it has time to soften.
- Remove the pan from heat. Squeeze the lemon juice over the beans and season with salt and pepper to taste. Stir once and taste — adjust the salt and acid until the flavors are bright and balanced.
- Serve in shallow bowls with crusty bread for sopping up the juices, or spoon over cooked rice, pasta, or any grain you like. A drizzle of good olive oil on top finishes it off nicely.
Notes
- For a heartier meal, add a diced chicken sausage or a handful of diced raw vegetables (bell pepper, zucchini) in step 2 and cook until tender before adding the beans.
- Drain the beans but skip rinsing them — the thin layer of starch left on the beans helps thicken the braising liquid into a light, silky sauce.
- Leftovers keep in the fridge for up to 4 days. Reheat gently on the stove with a splash of broth or water, as the beans will absorb most of the liquid overnight.