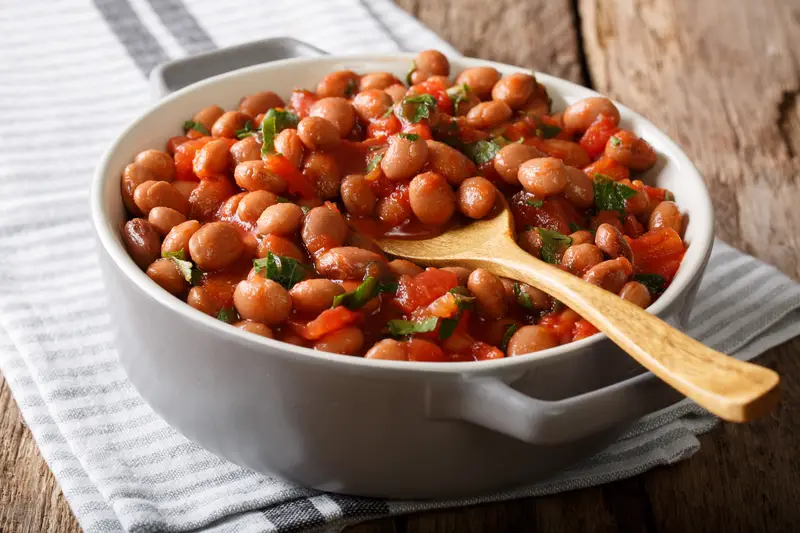
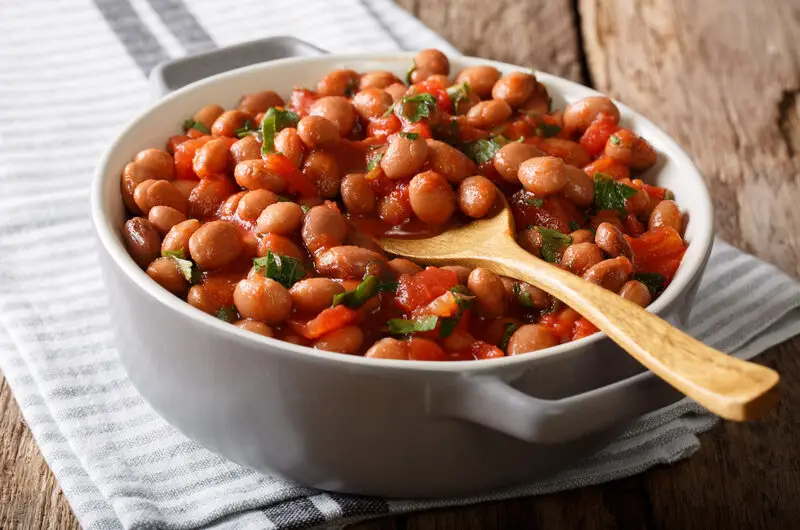
Opening a can of beans and heating them in the microwave might fill your stomach, but it won’t fill the void left by memories of grandma’s incredible bean dishes. Most people assume canned beans are destined to taste, well, canned. The truth is, there’s one simple technique that transforms those mushy, flavorless legumes into something that rivals any homemade version. The secret isn’t buying expensive brands or adding exotic ingredients – it’s all about treating canned beans like the blank canvas they actually are.
Most people skip the most important first step
The biggest mistake happens before the beans even hit the pan. Most home cooks open the can and dump everything directly into a pot, liquid and all. That cloudy, thick liquid isn’t helping anyone – it’s loaded with excess sodium and gives beans that distinct “canned” taste that screams processed food. This liquid also contains starches that make the final dish gummy and unappetizing.
Draining and rinsing canned beans removes up to 40% of sodium while washing away the preservatives and additives that mask the beans’ natural taste. Use a fine-mesh strainer and rinse with cold water for about 30 seconds, gently stirring with your hand. The beans should look cleaner and brighter when you’re done. This single step immediately improves both taste and texture.
Building flavor starts with the holy trinity
Grandma never just heated beans in water. She understood that beans are incredibly absorbent and will take on whatever surroundings them. Start by sautéing diced onions, celery, and bell peppers (the holy trinity of Southern cooking) in a tablespoon of oil until softened. This creates an aromatic base that infuses the beans with layers of flavor instead of leaving them tasting like cardboard.
Add minced garlic during the last minute of sautéing to prevent burning. The aromatics release essential oils that coat each bean as they simmer. Don’t rush this step – properly softened vegetables create the foundation that separates restaurant-quality beans from cafeteria slop. Even five minutes of sautéing makes a dramatic difference in the final result.
Low heat transforms texture completely
High heat is the enemy of good beans. Cranking up the burner might seem like a time-saver, but it actually breaks down the bean structure and creates a mushy mess. Instead, add the rinsed beans to your aromatics and barely cover with liquid – either low-sodium broth or water work fine. Bring to a gentle simmer, then reduce heat to the lowest setting possible.
Let the beans bubble lazily for 15-20 minutes, stirring occasionally. This slow cooking allows the beans to absorb the surrounding liquid without falling apart. The gentle heat also helps flavors meld together naturally. Many home cooks get impatient here, but this is where the magic happens. Your kitchen should smell amazing, and the beans should hold their shape while becoming tender throughout.
Timing your seasonings makes or breaks the dish
Adding salt too early draws moisture out of beans and prevents them from softening properly. Wait until the beans have simmered for at least 10 minutes before adding any salt, whether from seasoning blends, bouillon, or straight table salt. This allows the beans to absorb liquid first, then take on the seasoning during the final cooking phase.
Classic seasonings include bay leaves, thyme, black pepper, and a pinch of smoked paprika. Dried herbs work better than fresh for this application since they release flavor slowly during the simmering process. Taste and adjust seasoning during the last five minutes of cooking. The beans should taste well-seasoned but not overpowering – remember, they’re often served alongside other dishes.
A little fat creates richness that’s been missing
Grandma’s beans always had a richness that modern versions lack. The secret is adding a small amount of fat during cooking. A tablespoon of butter, a drizzle of olive oil, or even a small piece of bacon fat transforms the mouthfeel completely. The fat coats each bean and creates a silky texture that makes every bite satisfying rather than dry.
For vegetarian versions, olive oil or coconut oil work beautifully. The fat also helps carry flavors throughout the dish and prevents beans from sticking to the pan. Don’t go overboard – too much fat makes the dish greasy instead of rich. One tablespoon per can of beans is the sweet spot for most recipes.
Acid brightens everything at the end
Just before serving, add a splash of something acidic to wake up all the flavors. A tablespoon of apple cider vinegar, white wine vinegar, or fresh lemon juice cuts through the richness and makes the beans taste more vibrant. This is the difference between beans that taste flat and beans that make people ask for the recipe.
The acid also helps balance the earthiness of the beans themselves. Professional chefs use this technique in almost every savory dish to create depth and prevent flavors from tasting muddy. Add the acid gradually and taste as you go – you want brightness, not sourness. This final touch is what separates home cooking from restaurant-quality food.
Fresh herbs finish what good technique started
While dried herbs work during cooking, fresh herbs added at the very end provide a pop of color and freshness that canned beans desperately need. Chopped parsley, cilantro, or green onions sprinkled over the finished dish add visual appeal and a bright contrast to the rich, savory base. Even grocery store herbs make a noticeable difference.
The fresh herbs also provide textural contrast against the soft beans. Restaurant kitchens always finish bean dishes with fresh elements because it signals to diners that care was taken in preparation. This small detail transforms a side dish into something that looks and tastes intentional rather than thrown together at the last minute.
The real secret was never about the beans
Grandma’s beans tasted better because she understood that canned beans are just an ingredient, not a finished dish. She treated them with the same care and attention as any other component of her cooking. The one simple trick isn’t really one thing – it’s approaching canned beans with respect instead of resignation and giving them the time and attention they deserve.
Modern convenience doesn’t have to mean sacrificing flavor. By following these techniques, anyone can transform a 89-cent can of beans into something that tastes like it simmered all day. The total active cooking time is less than 30 minutes, but the results rival any homemade version. Sometimes the best tricks are the ones hiding in plain sight.
The next time someone compliments your beans, you’ll know the secret wasn’t expensive ingredients or complicated techniques. It was simply treating humble canned beans like they had potential all along. That’s exactly what grandma would have done, and exactly what she probably tried to teach anyone who paid attention in her kitchen.
Grandma-Style Canned Beans
Course: Side DishCuisine: American6
servings10
minutes25
minutes220
kcalTransform ordinary canned beans into rich, flavorful comfort food that tastes like it simmered all day.
Ingredients
2 cans (15 oz each) kidney beans, navy beans, or pinto beans
1 medium yellow onion, diced
2 celery stalks, diced
1 bell pepper (any color), diced
3 cloves garlic, minced
2 tablespoons olive oil or vegetable oil
1 cup low-sodium chicken broth or water
1 bay leaf
1 teaspoon dried thyme, 1/2 teaspoon smoked paprika, 1/2 teaspoon black pepper, 1/2 teaspoon salt, 1 tablespoon apple cider vinegar, 2 tablespoons fresh parsley, chopped
Directions
- Drain both cans of beans in a fine-mesh strainer and rinse thoroughly with cold water for 30 seconds, gently stirring with your hand. Continue rinsing until the water runs clear and the beans look brighter and cleaner. Set the drained beans aside while you prepare the aromatics.
- Heat the oil in a large, heavy-bottomed saucepan or Dutch oven over medium heat. Add the diced onion, celery, and bell pepper to the pan. Cook for 5-7 minutes, stirring occasionally, until the vegetables are softened and the onion becomes translucent.
- Add the minced garlic to the pan and cook for 1 minute more, stirring constantly to prevent burning. The kitchen should smell fragrant and aromatic at this point. The garlic should be fragrant but not browned.
- Add the drained beans to the pan along with the bay leaf and enough broth or water to barely cover the beans. Bring the mixture to a gentle simmer over medium heat, then immediately reduce the heat to low. The liquid should barely bubble, not boil vigorously.
- Allow the beans to simmer gently for 10 minutes, stirring occasionally and adding more liquid if needed to prevent sticking. After 10 minutes, add the thyme, smoked paprika, black pepper, and salt. Continue simmering for another 10-15 minutes until the beans are heated through and have absorbed most of the flavors.
- Remove the bay leaf and discard it. Stir in the apple cider vinegar and taste for seasoning, adjusting salt and pepper as needed. The beans should be tender but still hold their shape, and the liquid should be slightly thickened but not dry.
- Remove from heat and let the beans rest for 2-3 minutes to allow the flavors to settle. Sprinkle the fresh chopped parsley over the top just before serving. The beans can be served immediately or kept warm on low heat for up to 30 minutes.
- Serve hot as a side dish alongside cornbread, grilled meats, or rice. Store any leftovers in the refrigerator for up to 4 days and reheat gently on the stovetop with a splash of broth if needed.
Notes
- Any variety of canned beans works well – kidney, navy, pinto, black, or cannellini beans all respond beautifully to this technique.
- For vegetarian version, use vegetable broth or water instead of chicken broth. For extra richness, add 1 tablespoon of butter during the last 5 minutes of cooking.
- Don’t skip the rinsing step – it removes up to 40% of the sodium and eliminates the canned taste that many people dislike.
Frequently Asked Questions
Q: Can I use dried beans instead of canned for this recipe?
A: While this recipe is specifically designed for canned beans, you can adapt it for cooked dried beans. Start with about 3 cups of cooked dried beans and reduce the cooking time to just 10-15 minutes since they’re already tender. The key is still building the aromatic base and adding seasonings at the right time.
Q: How far ahead can I make these beans?
A: These beans actually taste better the next day as the flavors continue to develop. Make them up to 3 days ahead and store covered in the refrigerator. Reheat gently on the stovetop over low heat, adding a splash of broth if they seem too thick. Add fresh herbs just before serving for the best appearance.
Q: What can I substitute if I don’t have all the holy trinity vegetables?
A: If you’re missing celery or bell pepper, you can substitute with diced carrots, leeks, or even mushrooms. The key is having aromatic vegetables to build flavor. Onion is the most important component, so don’t skip that. Frozen mirepoix (diced onion, celery, and carrot) also works in a pinch.
Q: Why do my beans fall apart even when I use low heat?
A: This usually happens when beans are overcooked or if you’re stirring too vigorously. Some canned bean brands are softer than others, so reduce cooking time by 5-10 minutes for very tender varieties. Also, use a gentle folding motion instead of aggressive stirring, and make sure your heat is truly low – the liquid should barely simmer.


